- Products
- Blog
- Stockists
- About
- Contact
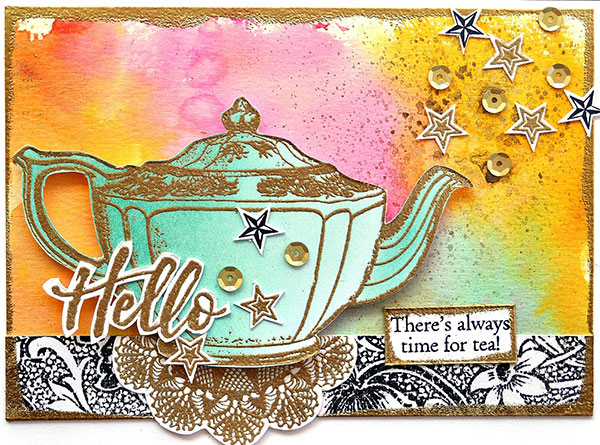
Hello! Today we are sharing two projects by Belinda Spencer using the Cup Of Tea Rubber Stamp Set!

Instructions:
1. Apply mini Distress Ink pads directly onto a heat resistant craft mat. I have used Peacock Feathers, Picked Raspberry and Wild Honey. Spritz with water. Cut a piece of watercolour paper to size and place face down on the craft mat. Swipe it a little as you remove it from the craft mat. Turn it over and dry thoroughly with a heat gun.
2. Using Jet Black Ranger Archival Ink, apply the Flower Garden Background Stamp to a small strip of smooth white cardstock. Stick down at the bottom of the watercolour piece from Step 1. Apply embossing ink around the edges of the whole piece and heat set with gold embossing powder. Spray a little Heirloom Gold Perfect Pearls Mist over the background.
3. Stamp a doily from the Doilies Rubber Stamp Set on white cardstock using embossing ink. Heat set with the same gold embossing powder. Fussy cut the doily and stick down at the bottom of the card front as per the example. This forms the mat for the teapot to sit on.
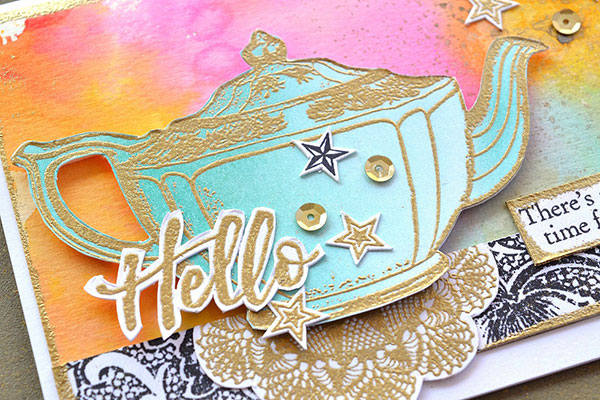
4. Apply the teapot stamp on smooth white cardstock using embossing ink and heat set with gold embossing powder. Fussy cut the teapot and ink with Peacock Feathers Distress Ink. Add to the card front using 3D foam for added dimension.
5. Stamp the quote using Jet Black Archival Ink. Cut out and apply gold embossing powder to the edges as in Step 2. Also stamp the ‘hello’ from the Brushed Sentiments Rubber Stamp Set with embossing ink. Heat set with the gold embossing powder and then fussy cut the word. Stick down on the teapot.
6. Stamp some tiny stars from the Stars Rubber Stamp Set. Stamp one type with Jet Black ink and gold emboss the other. Fussy cut each little star and add to the card front. Lastly add some vintage gold sequins.

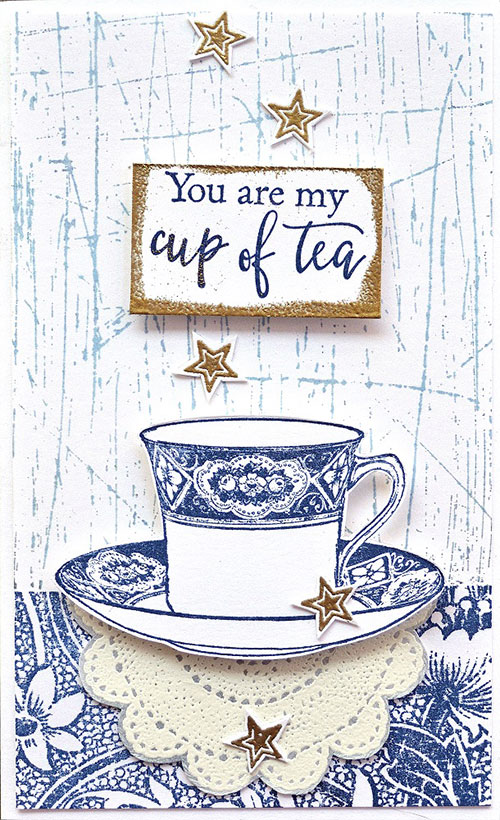
Here is a card using the teacup stamp:

Instructions:
1. Cut a piece of smooth white cardstock 9cm x 15cm.
2. Stamp the bottom quarter of this piece with the Flower Garden Background Stamp using Cobalt Archival Ink. Stamp the rest of the piece with the Scratches Background Stamp using Sky Blue Archival Ink. Stick down on a white cardstock base.
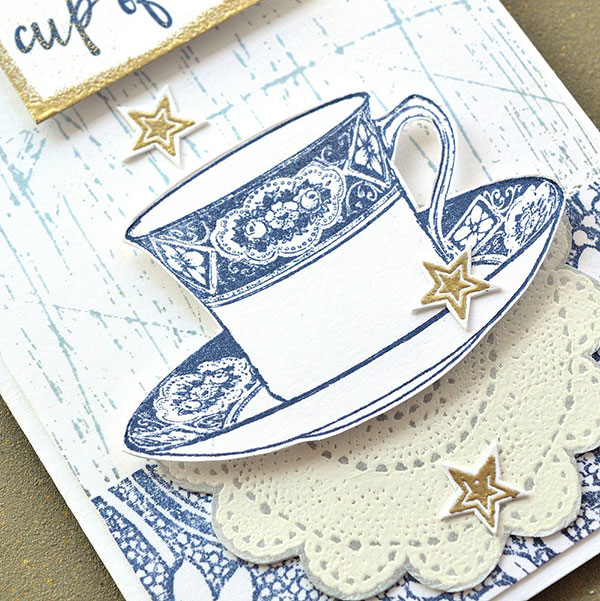
3. Stamp a doily from the Doilies Rubber Stamp Set on white cardstock using embossing ink. Heat set with super fine detail white embossing powder. Rub in some Weathered Wood Distress Ink using an ink blending tool. Fussy cut and remove about a third of the doily. Add to the card front so that it is aligned with the edge of the Flower Garden background.
4. Apply the teacup stamp on white cardstock using the Cobalt ink. Fussy cut and add to the card using 3D foam.
5. Gold emboss some tiny stars from the Stars Rubber Stamp Set. Fussy cut and add to the card.
6. Stamp the quote on white cardstock using the Cobalt ink. Cut out and gold emboss the edges. Add to the card with 3D foam.

Supplies used:
Darkroom Door Cup of Tea Rubber Stamp Set
Darkroom Door Doilies Rubber Stamp Set
Darkroom Door Stars Rubber Stamp Set
Darkroom Door Brushed Sentiments Rubber Stamp Set
Darkroom Door Flower Garden Background Stamp
Darkroom Door Scratches Background Stamp
Ranger Archival Ink: Jet Black, Cobalt, Sky Blue
Ranger Embossing Powder: Princess Gold, White Fine Detail
Ranger Perfect Pearls Mist Heirloom Gold
Distress Embossing Ink
Distress Ink: Peacock Feathers, Picked Raspberry, Wild Honey, Weathered Wood
Non stick craft sheet
Mister Bottle
Watercolour Cardstock
Heat Tool
Thanks for stopping by the blog today!
There's always time for tea!