- Products
- Blog
- Wholesale
- Stockists
- About
- Contact
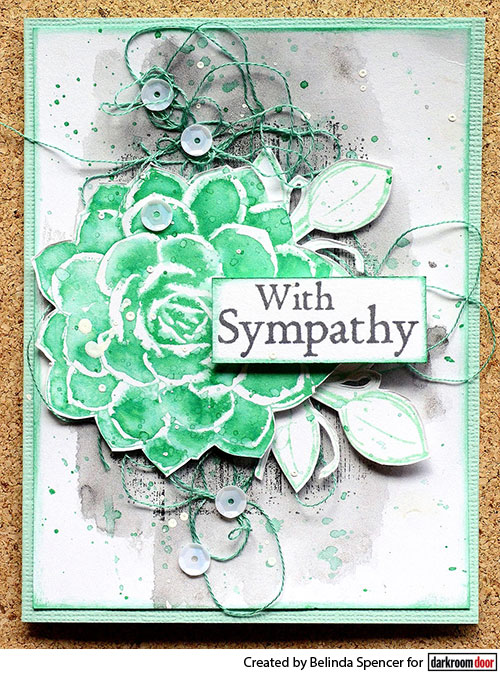
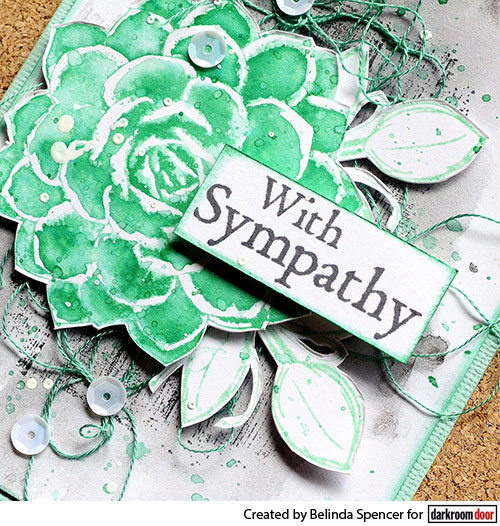
Hello! It's Belinda Spencer here again today sharing a series of cards using the Succulents Stamp Set.
Instructions:
1. Cut a piece of aqua cardstock 12.5cm x 19cm. Fold in half to form the card base.
2. Cut a piece of smooth white cardstock 9cm x 12cm. Apply the Woodgrain Texture Stap in the centre using Watering Can Archival Ink. Wash some grey watercolour paint over the top of the stamped area. Dry with a heat gun. Ink the edges with Cracked Pistachio Distress Ink. Stick down on the card base.
3. Apply Lucky Clover Distress Ink to the Succulents stamp and spritz with a fine mist of water. Just a little. Stamp on a separate piece of smooth white cardstock. Use a fine soft wet paintbrush to smooth and blend the ink. Dry with a heat gun and then fussy cut.
4. Apply Cracked Pistachio Distress Ink to the Fine Leaves stamp. Huff on it before stamping on white cardstock. Dry the ink and then fussy cut the leaves.
5. Add some messy strands of co-ordinating embroidery thread to the card front. Layer on the fussy cut leaves followed by the succulent. Use 3D foam under the succulent to give it some dimension. Flick some Lucky Clover ink over the card front as well as some white droplets from a paint pen.
6. Stamp a sentiment and add to the card using 3D foam. Glue
on some sequins to finish.
Supplies used:
Darkroom Door Succulents Rubber Stamp Set
Darkroom Door Fine Leaves Rubber Stamp Set
Darkroom Door Gum Trees Rubber Stamp Set
Darkroom Door Woodgrain Texture Stamp
Archival Ink Watering Can
Distress Ink: Cracked Pistachio, Lucky Clover
PRIMA Metallic Accents Watercolour Paints
Embroidery thread
Sequins
UNI Posca Pen white
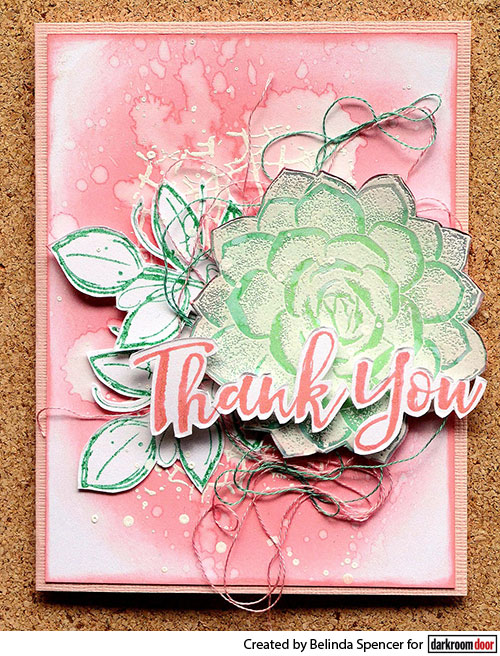
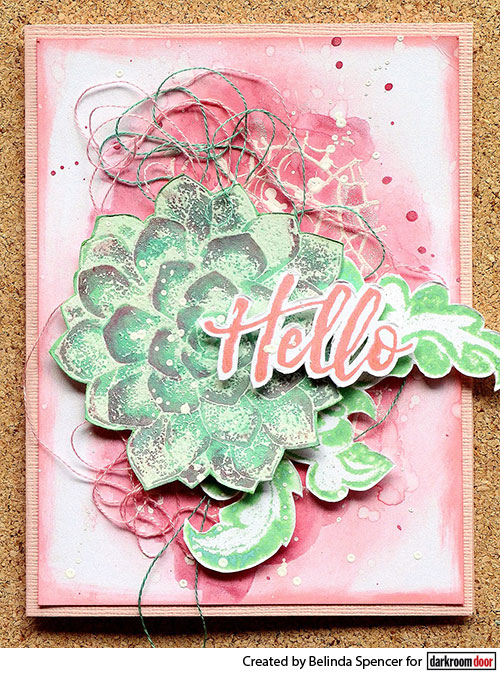
Instructions:
1. Cut a piece of pale pink cardstock 12.5cm x 19cm. Fold in half to form the card base.
2. Cut a piece of smooth white cardstock 9cm x 12cm. Apply Worn Lipstick Distress Oxide to this piece using an ink blending tool. Splash some water over the surface using your fingertips. Dry with a heat gun. It needs to be perfectly dry for the next step.
3. Apply Distress Embossing Ink to the Crackle Texture Stamp and stamp on the pink background. Heat set with white embossing powder. Ink the edges of this piece with the Worn Lipstick ink. Stick down on the card front.
4. Apply Lucky Clover Distress Ink to the Fine Leaves stamp. Huff on it and stamp on a separate piece of smooth white cardstock. Dry the ink and fussy cut the leaves. Add some messy co-ordinating embroidery thread to the card front and layer the leaves on top.
5. Apply embossing ink to the succulent stamp and stamp on white cardstock. Heat set with white embossing powder. Apply Cracked Pistachio Distress Oxide to the centre of this image using an ink blending tool. Apply Lucky Clover Distress Ink around the edge. Fussy cut the succulent and add to the card front with 3D foam.
6. Apply the Worn Lipstick Distress Oxide ink to the sentiment stamp and stamp on white cardstock. Dry the ink with a heat gun before fussy cutting. Add to the card with 3D foam.
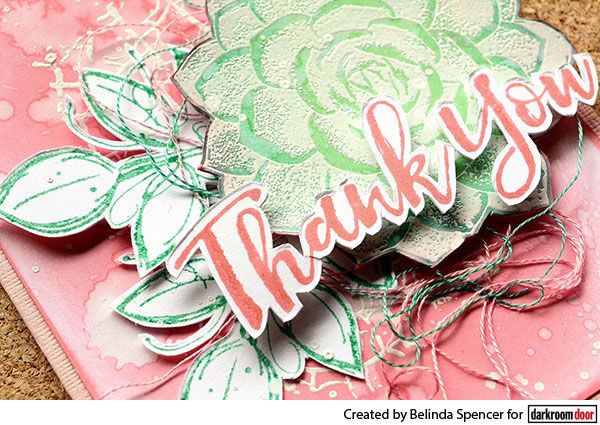
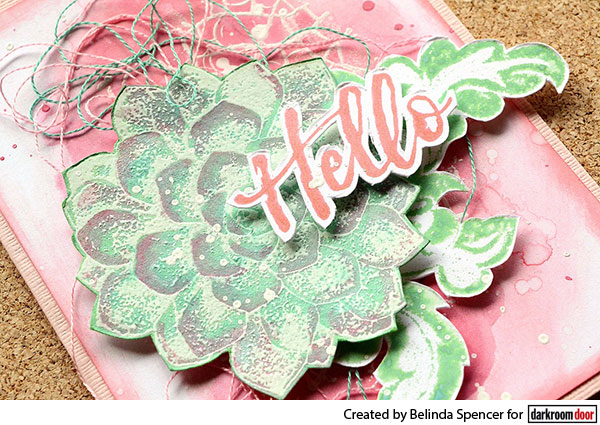
Here is another card I created using the same techniques.
Supplies used:
Darkroom Door Succulents Rubber Stamp Set
Darkroom Door Fine Leaves Rubber Stamp Set
Darkroom Door Brushed Sentiments Rubber Stamp Set
Darkroom Door Crackle Texture Stamp
Darkroom Door Fancy Flourish Eclectic Stamp
Distress Oxide: Cracked Pistachio, Worn Lipstick
Distress Ink: Lucky Clover
Distress Embossing Ink
White embossing powder
Embroidery thread
UNI Posca Pen
I hope you love this fabulous stamp set as much as me and you are inspired to create your own sweet succulents cards.
Thanks for stopping by.
Belinda
Succulents Stamp Set Cards