- Products
- Blog
- Stockists
- About
- Contact
Hi there, Suzz Czosek here today. I am sharing 3 different cards and an ornament that I have created using the Snowflakes Background Stamp! This stamp is so versatile and had me thinking of how I could bring winter to some of my favorite Darkroom Door stamp scenes.
I'm in love with the new Wild Africa series and the Lion spoke to me. I created a card based on him in the winter. I was very inspired by Aslan from Narnia in the C.S. Lewis series.
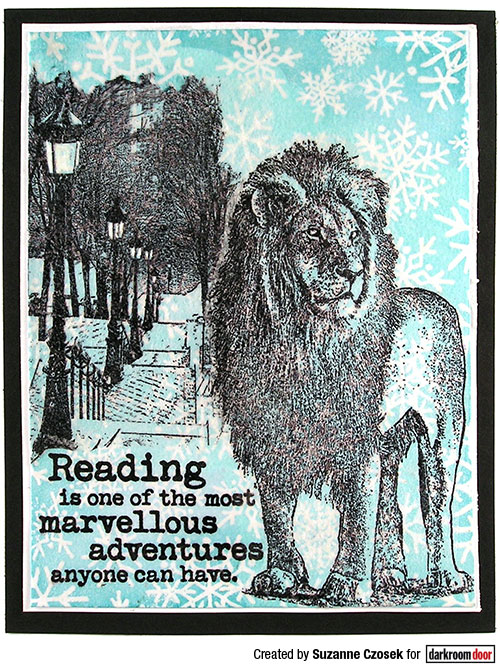
Instructions:
1. Stamp Reading sentiment from Bookworm Rubber Stamp Set onto white background using Jet Black Archival ink.
2. Stamp the Snowflake Background over the stamped sentiment using Distress Embossing Ink. Heat emboss with clear embossing powder.
3. Sponge on Tumbled Glass Distress ink over Snowflakes and sentiment.
4. Stamp Lion from Wild Africa Volume 2 Stamp Set in Jet Black Archival ink on tissue paper.
5. Stamp street lights from Montmartre Stamp Set using Jet Black Archival ink on tissue paper.
6. Apply collage medium to background and tear out street light and cut out lion and apply to background. Apply collage medium over top of tissue paper as well to seal the images. The images will tear once wet and are difficult to move so be careful when placing them on your background. The edges will not show of the tissue paper as the medium will seal them and make them clear.
7. Mount background to black card base.
Supplies Used:
Darkroom Door Snowflakes Background Stamp
Darkroom Door Bookworm Rubber Stamp Set
Darkroom Door Wild Africa Vol 2 Rubber Stamp Set
Darkroom Door Montmartre Rubber Stamp Set
Distress Ink: Tumbled Glass
Archival Ink: Jet Black
Distress Embossing Ink
Embossing Powder: Clear
Distress Collage Medium: Matte
I decided it would be fun to create a rustic card featuring the Old Truck with a snowy background.
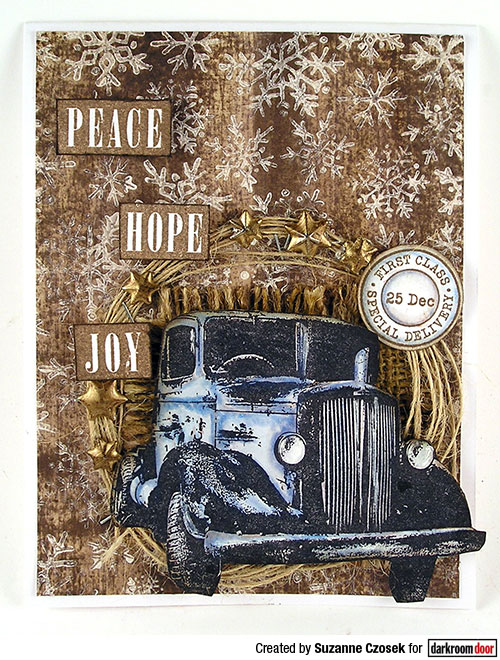
Instructions:
1. Stamp the Woodgrain Background stamp with Vintage Photo Distress ink on white cardstock.
2. Paint the Snowflakes stamp with white acrylic paint. Stamp over the Woodgrain background. Clean stamp with water to remove all paint.
3. After the paint has dried, drag Vintage Photo Distress ink pad down across the stamped image and snowflakes to create more streaks of brown ink. Sponge and wipe off excess ink with ink blending tool and wipe. Repeat until you get the effect you desire with the snowflakes and the background.
4. Stamp Old Truck Photo Stamp using Jet Black ink on white cardstock. Cut out truck.
5. Color truck with watercolor pencils and water brush. After dry sponge edges with Vintage Photo Distress ink.
6. Dye piece of burlap with brown and gold dye inks and Distress Spray Stains. Let dry.
7. Stamp words and postmark from Christmas Reindeer Stamp Set using Vintage Photo ink on white cardstock. Cut out.
8. Assemble card by layering background on white card base.
9. Place burlap on background. Add twine in circle around burlap. Staple to the card. Add pop dots to truck and place on burlap. Accent with stars and postmark.
10. Add sentiments with pop dots.
Supplies Used:
Darkroom Door Snowflakes Background Stamp
Darkroom Door Woodgrain Background Stamp
Darkroom Door Old Truck Photo Stamp
Distress Ink: Vintage Photo
Archival Ink: Jet Black
Distress Paint: Picket Fence
Ink Blending Tool
Watercolour Pencils
Aquash Brush
Distress Spray Stain: Tarnished Brass, Vintage Photo
I love non-traditional colors for holiday cards as they add a fun and quirky twist to a card. I decided to try out a coral holiday card using the Snowflakes Background Stamp with the Christmas Reindeer Stamp Set.
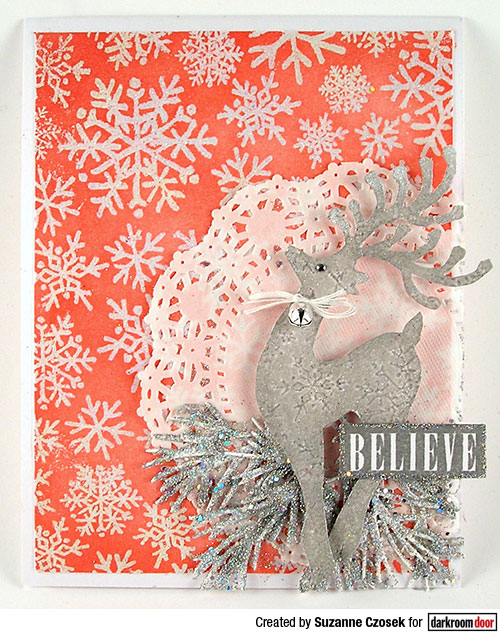
Instructions:
1. Stamp the Snowflakes Background using Distress Embossing ink on white background. Heat emboss using Bridal Tinsel embossing powder which is an iridescent embossing powder. The embossing powder doesn't show up in the pictures as shimmering but it has a beautiful shimmer.
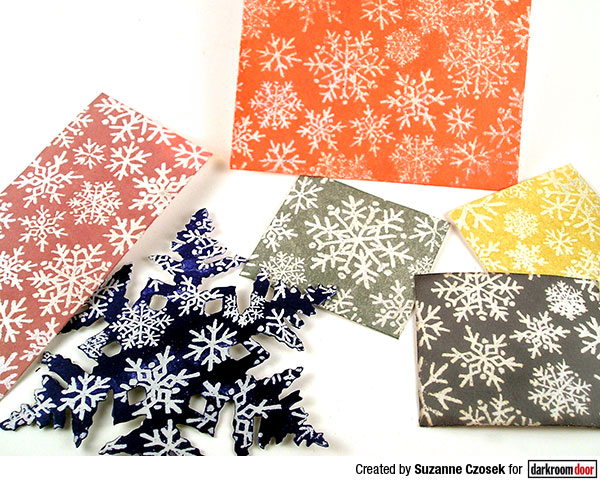
Here is a picture of the same embossed background in a variety of colors to give you an idea of the variety of backgrounds you could create.
2. Ink up reindeer stamp from the Christmas Reindeer set with silver ink. Leave stamp facing up with ink on it and kiss the stamp with the snowflake stamp to remove a touch of the silver ink from the reindeer stamp. Then stamp the reindeer image on white cardstock.
3. Cut out reindeer. Ink up stamped image with Distress Embossing Ink and emboss using Bridal Tinsel embossing powder.
4. Tie tiny bell to reindeer.
5. Stamp Believe sentiment using Hickory Smoke ink. Cut out and apply silver glitter around the edges.
6. Die cut branches. Apply silver glitter.
7. Assemble card. Mount background on white card base. Cut doily and place in corner. Attach silvery branches on the bottom. Pop dot reindeer and place on branches and doily. Attach sentiment.
Supplies Used:
Darkroom Door Snowflakes Background Stamp
Darkroom Door Christmas Reindeer Rubber Stamp Set
Distress Embossing Ink Pad
Embossing Powder: Bridal Tinsel
Distress Inks: Hickory Smoke
Distress Dry Glitter
I love creating ornaments for the holidays that I can attach to gifts or give as a gift. The Snowflakes Background Stamp had me thinking of a three dimensional snowflake.
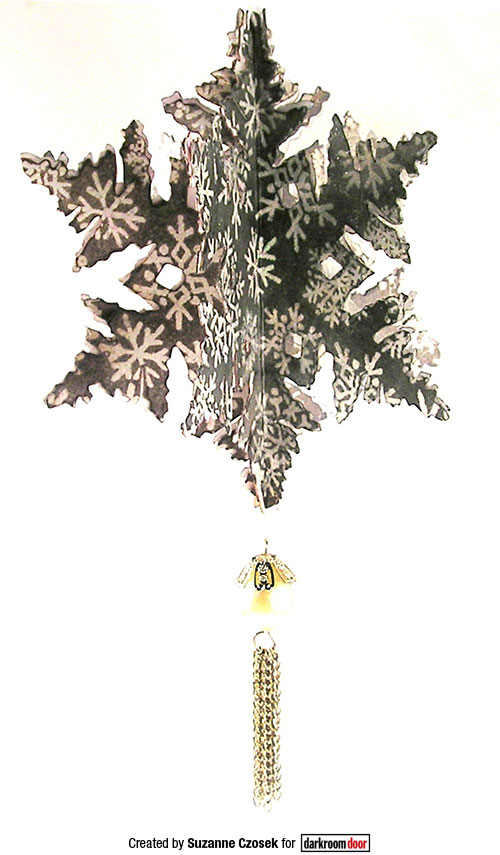
Instructions:
1. Die cut 6 snowflakes from white cardstock.
2. Decide what color you want your snowflake to be and sponge over the back of the snowflake with the color of choice. Heat set the color on the back before moving on. This will help when you go to assemble your snowflake.
3. Stamp snowflake background on the fronts of the die cut snowflakes using Distress Embossing ink. Heat emboss with Bridal Tinsel embossing powder. (You can use clear embossing powder as well, the tinsel just adds a shimmer)
4. Apply the dye ink over your embossed snowflakes. You can either sponge on the dye ink or drag the ink pad directly over your snowflake and sponge over it to apply it evenly. Use a paper cloth to rub off excess on your stamped snowflakes.
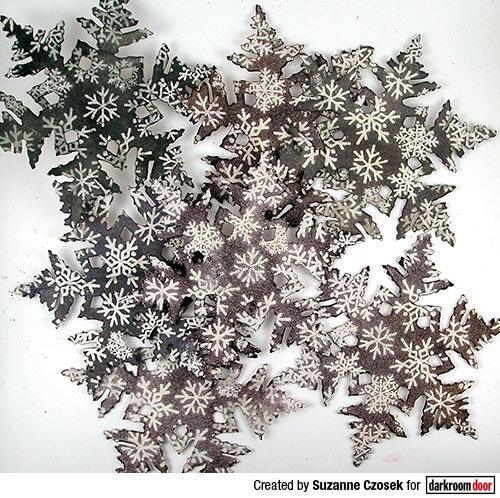
5. Score and fold snowflakes in half. Repeat on all snowflakes making sure the are aligned the same way when scoring them.
6. Apply adhesive and start connecting the snowflakes together. Repeat until last snowflake is ready to go.
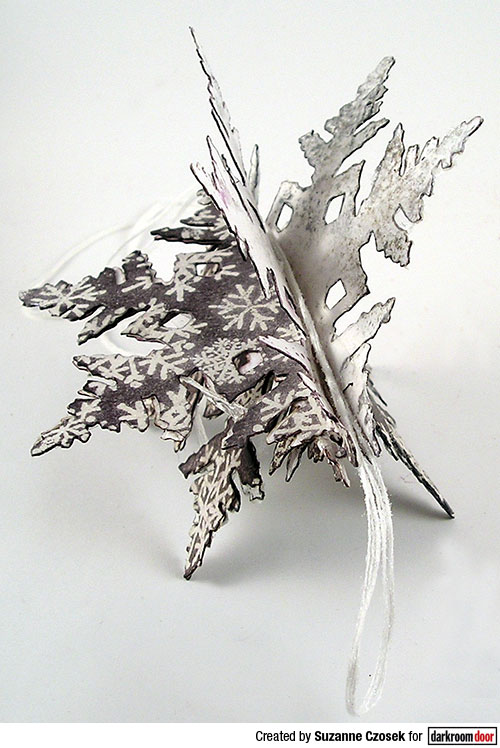
7. Prepare string with charm. I put glue on my string and covered it in a fine glitter to add a shimmer to my string. You can use whatever you would like for hanging your ornament. Take the string and slide the charm on the string and then loop it in a circle and tie it with a double note and then lay the looped string in the centre of your snowflake before putting the last snowflake together. I used tape, glue stick and touches of tacky glue. Work with what seals best for your to put these together. You could also die cut adhesive sheets to use between the snowflakes.
Supplies Used:
Darkroom Door Snowflakes Background Stamp
Sizzix Tim Holtz Layered Snowflake Die
Distress Embossing Ink Pad
Embossing Powder: Bridal Tinsel
Distress Inks: Hickory Smoke
Distress Dry Glitter
Thanks for stopping by!
Snowflakes Cards and Ornament