- Products
- Blog
- Stockists
- About
- Contact
Hi there! We have some fabulous new projects to share with you today using the Skateboard Photo Stamp!
First are two cards by Belinda Spencer:
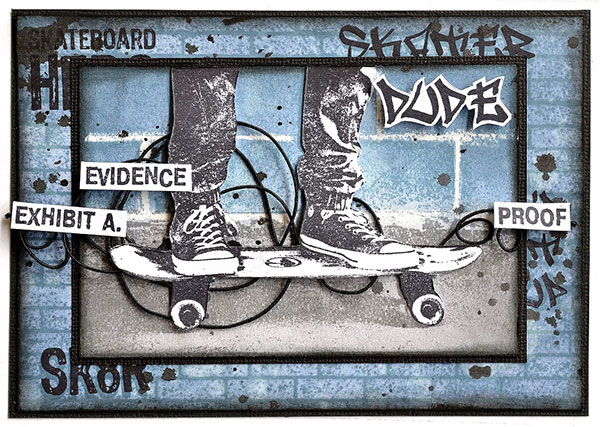
Instructions:
1. Apply the Brick Wall Background Stamp onto a piece of smooth white cardstock cut to size using Cornflower Blue Ranger Archival Ink. Use an ink blending tool to apply Stormy Sky and Faded Jeans ink. Stamp with quotes from the Skater Rubber Stamp Set using Jet Black Ranger Archival Ink. Stick down on a slightly larger piece of black cardstock and then on a white cardstock card base.
2. Apply the Skateboard Photo Stamp onto another piece of smooth white cardstock cut to size using the Cornflower Blue ink for the wall section and Watering Can ink for the ground section of the stamp. Use a white crayon to draw in the mortar on the wall. Use an ink blending tool to add Stormy Sky and Faded Jeans ink to the wall and Hickory Smoke ink to the ground. Stick down on a slightly larger piece of black cardstock. Stick down on the card front.
3. Stamp the Skateboard stamp again on another piece of smooth white cardstock using Jet Black Ranger Archival Ink. Fussy cut the skateboard and skater. Add some black wire thread or twine to the card front. Layer the Skater and skateboard over the top using 3D foam.
4. Stamp the 'dude' from the Skater Rubber Stamp Set using the Jet Black ink as well as some words from the Photography Rubber Stamp Set. Fussy cut and add to the card.
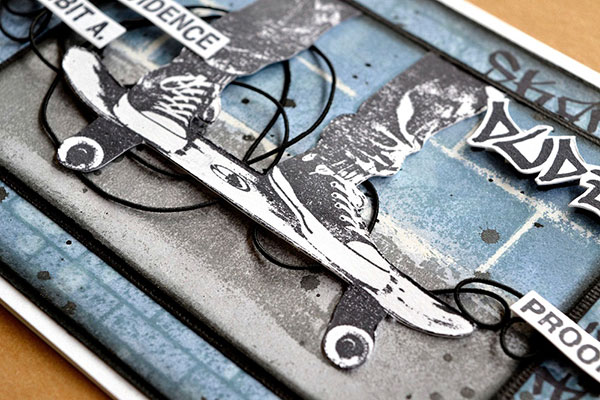
This stamp also looks great just in black and white:
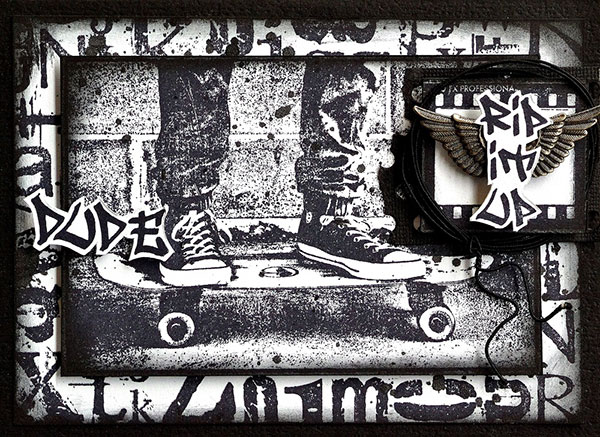
Instructions:
1. Apply the Alphabet Background Stamp onto a piece of smooth white cardstock cut to size using Jet Black Ranger Archival Ink. Use an ink blending tool to apply Black Soot Tim Holtz Distress Ink to the edges. Stick down on a black cardstock card base.
2. Apply the Skateboard Photo Stamp onto another piece of smooth white cardstock cut to size using the Jet Black ink. Ink the edges with the Black Soot ink. Add to the card front using 3D foam.
3. Stamp the filmstrip image from the Photography Rubber Stamp Set on a scrap of white cardstock with the Jet Black ink. Cut out and add to the card front using 3D foam. Add a circle of black twine or wire thread around the film strip. Add a metal wings charm on top of this.
4. Stamp the 'rip it up' and the 'dude' from the Skater Rubber Stamp Set using the Jet Black ink. Fussy cut and add to the card using 3D foam. Flick some black ink over the top of the card.

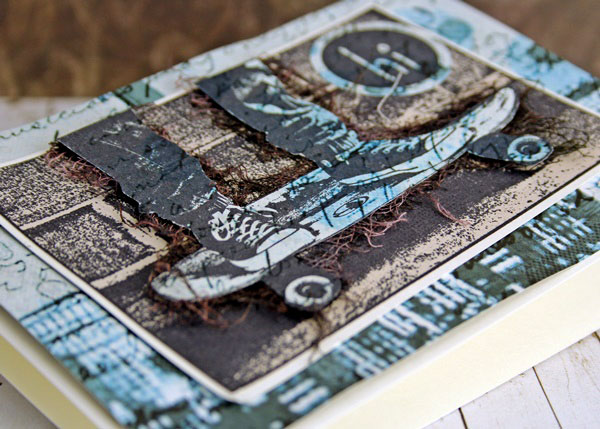
Teresa Abajo has created a cool street scene card:
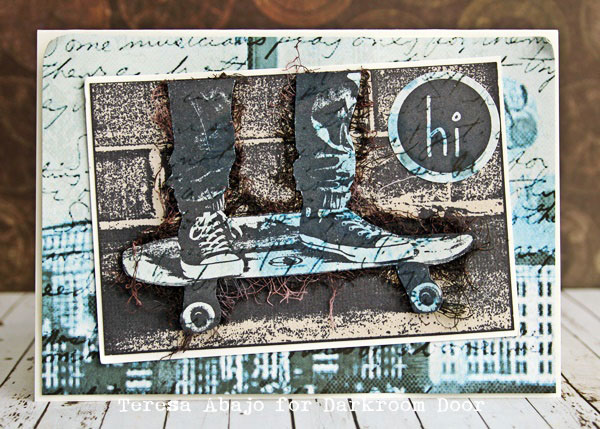
Instructions:
1. Stamp the Skater image using Archival Jet Black ink onto light brown cardstock and onto blue patterned paper.
2. Fussy cut the legs and skateboard from the blue patterned paper and layer over some cotton gauze that has been coloured black.
3. Adhere this in place over the image on brown cardstock, then onto a piece of blue patterned paper.
4. Stamp the 'hi' circle from the Simply Circles stamp set in black ink, punch it out and adhere to the card.
Lastly, here's a quick and easy card by Rachel Greig:
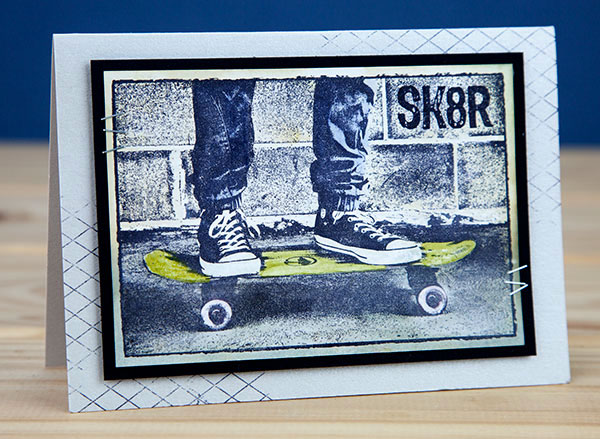
Instructions:
1. Stamp Skateboard Photo Stamp onto white cardstock using Jet Black Archival Ink. Colour the skateboard with Crushed Olive Distress Marker. Colour the jeans with Weathered Wood and Stormy Sky Distress Markers. Sponge around the image with Weathered Wood Distress Ink.
2. Adhere to black cardstock and use a tiny attacher to add some small staples to the sides of the image.
3. Stamp the Criss Cross Texture Stamp onto a folded light blue card using Cobalt Archival Ink.
4. Adhere Skateboard image to card using foam adhesive.
Anneke De Clerck has created four different cards using the Skateboard Photo Stamp! Here is the first one:
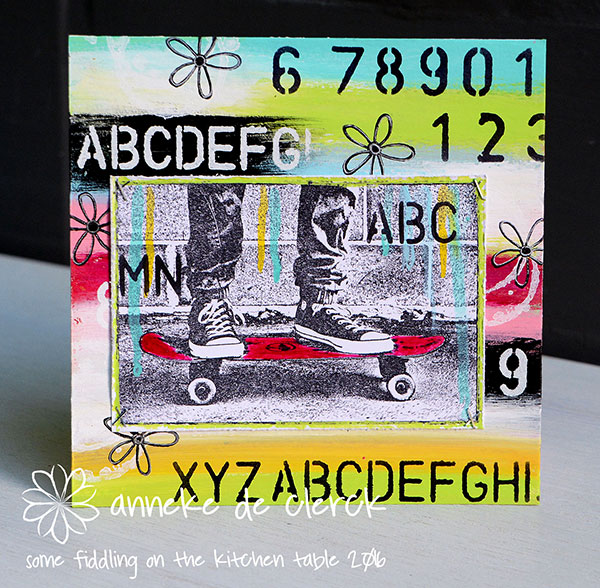
Instructions:
1. Apply stripes of paint on a 6 x 6" (15 x 15 cm) card panel
2. Add black and white paint on top randomly
3. Create letters and numbers by sponging through stencils using black and white acrylic paint
4. Stamp stains from the Coffee Time set with white paint
5. Stamp flowers from the Whimsical Words set wit black paint, add accents with a white pen
6. Stamp the Skateboard Photo Stamp with Archival Ink Jet Black on watercolor paper and cut out
7. Sponge letters on top with black paint, make drips with diluted light blue, yellow and turquoise paint
8. Color the skateboard with magenta paint
9. Add lime paint to the edges of the skateboard print and adhere it to the painted background using mini staples
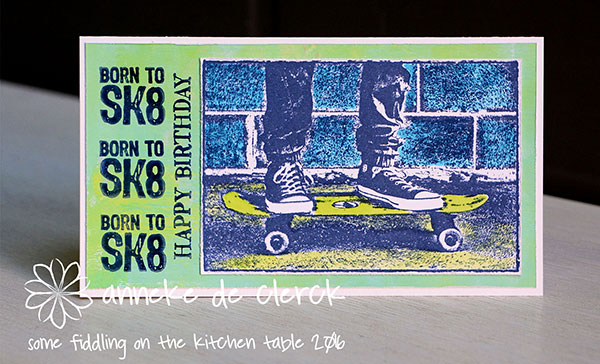
Instructions:
1. Stamp the Skateboard Photo Stamp on watercolor paper using Archival Ink Cobalt
2. Color the print with Distress Ink Mermaid Lagoon and Twisted Citron using a water brush
3. Cut a background out of painted paper and glue the stamped print on top
4. Stamp text using Archival Ink Cobalt
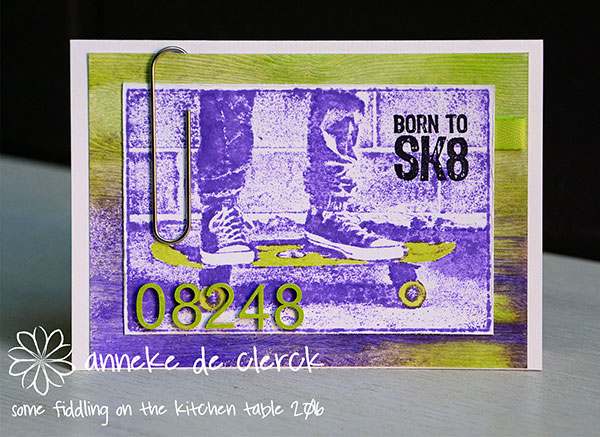
Instructions:
1. Color Distress Woodgrain Cardstock with Spray Stains Twisted Citron and Wilted Violet
2. Stamp the Skateboard Photo Stamp on watercolor paper using Distress Ink Wilted Violet
3. Color the skateboard with Distress Ink Twisted Citron using a water brush
4. Stamp text to the right upper corner using Archival Ink Jet Black
5. Paint wooden numbers with Distress Paint Twisted Citron
6. Assemble the card as shown, decorate with a paperclip and some ribbon
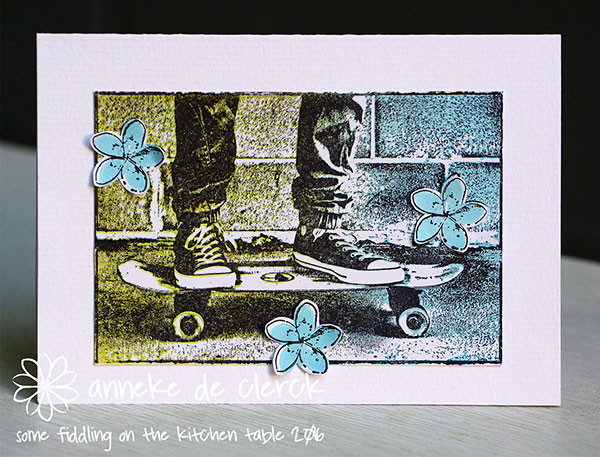
Instructions:
1. Pick up a thin layer of lime and sky paint with a brayer, make sure the lime paint is at one side, sky at the other
2. Load the Skateboard Photo Stamp with that paint and make a print
3. Overstamp with Archival Ink Jet Black
4. Stamp mini solid flowers from the Full Bloom Vol 2 set on scraps of paper using sky paint
5. Overstamp with the mini open flowers using Archival Ink Jet Black, cut out
6. Assemble the card as shown
Godelieve Tijskens has two cards to share:
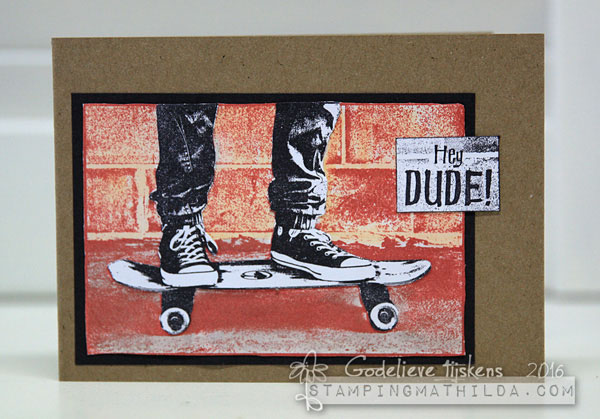
Instructions:
1. I stamped the Skateboard Photo Stamp with Archival Ink Vermillion on smooth watercolor paper
2. I used Distress inkpads and a brush to watercolor the image. A stamping block was used as a palette.
3. The image was stamped once more with black Archival ink.
4. The cut out legs and board was glued onto the colored image.
5. Words from the Robot Vol 1 set are stamped onto the brick background and cut out too.
6. The image was glued onto black cardstock, and then onto a kraft card.
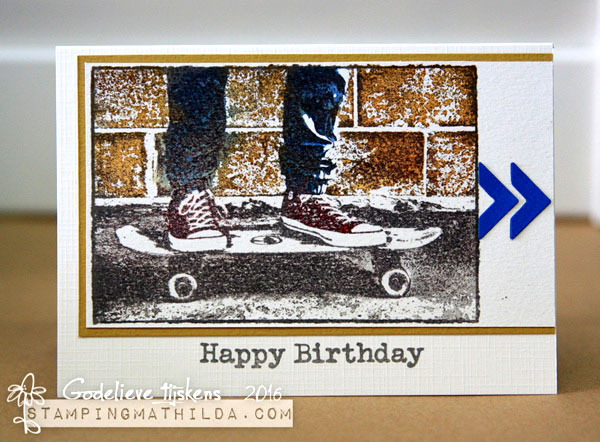
Instructions:
1. For this card I used watercolor paper
2. I used a MISTI stamping tool, a handy stamp positioner.
3. I inked the stamp with Distress Markers and misted with water. I stamped the colors one by one and let them dry inbetween, to avoid that the colors would mix. The colors I used are Rusty Hinge, Festive Berries, Faded Jeans and Hickory Smoke.
4. Then I over stamped the complete image with Archival Ink Watering Can.
5. I layered the image with brown cardstock.
6. Blue photo corners were used as arrows to embellish the card.
7. I glued the panel onto a white card, and stamped the words from the Happy Birthday set with Archival ink too.
Supplies used:
Darkroom Door Skateboard Photo Stamp
Darkroom Door Brick Wall Background Stamp
Darkroom Door Skater Rubber Stamp Set
Darkroom Door Photography Rubber Stamp Set
Darkroom Door Simply Circles Rubber Stamp Set
Darkroom Door Alphabet Background Stamp
Darkroom Door Criss Cross Texture Stamp
Darkroom Door Full Bloom Vol 2 Rubber Stamp Set
Darkroom Door Happy Birthday Rubber Stamp Set
Darkroom Door Skater Rubber Stamp Set
Darkroom Door Coffee Time Rubber Stamp Set
Darkroom Door Whimsical Words Rubber Stamp Set
Darkroom Door Robot Vol 1 Rubber Stamp Set
Ranger Archival Ink: Cornflower Blue, Jet Black, Watering Can, Cobalt
Ranger Distress Ink: Black Soot, Faded Jeans, Hickory Smoke, Stormy Sky, Weathered Wood
Distress Markers: Crushed Olive, Stormy Sky, Weathered Wood
Distress Ink: Mermaid Lagoon, Twisted Citron, Wilted Violet, Rusty Hinge, Pumice Stone
Dina Wakley Media Acrylic Paint: Sky, Lime, Turquoise,White, Black, Lemon, Magenta
Archival Ink: Jet Black, Cobalt, Watering Can, Vermillion
Distress Woodgrain Cardstock
Distress Spray Stains: Twisted Citron, Wilted Violet
Distress Paint: Twisted Citron
Distress Markers: Rusty Hinge, Festive Berries, Faded Jeans, Hickory Smoke
Ranger Watercolour Paper
Donna Downey Signature Stencils: Mini Numbers Repeat, Mini Alpha Rerun White crayon
Thanks for stopping by today!
Skateboard Photo Stamp Project Ideas