- Products
- Blog
- Stockists
- About
- Contact
Hi there stampers! Today we'd like to share some amazing projects using the Sailboat Photo Stamp!
Our first set of cards are by Belinda Spencer:
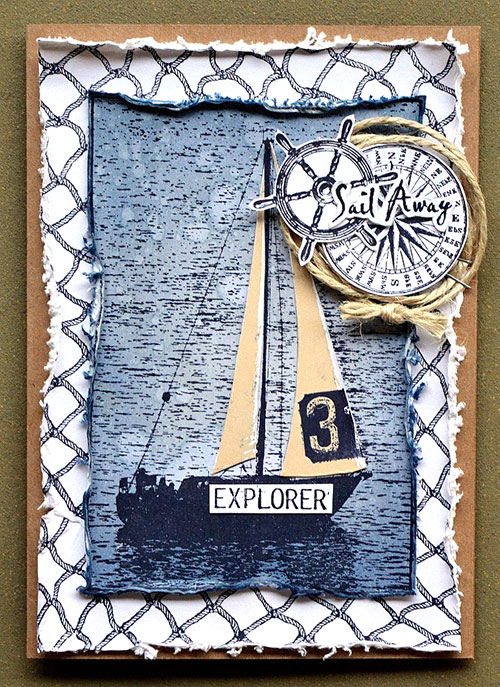
Instructions:
1. Apply the Fishing Net Background Stamp to smooth white cardstock using Jet Black Ranger Archival Ink. Distress the edges and stick down on a kraft cardstock card base.
2. Apply the Sailboat stamp onto another piece of white cardstock cut to size using the Jet Black ink. Using an ink blending tool, apply Stormy Sky and Weathered Wood Distress Inks to the background. Flick some water over the top with your fingertips for a water stained look. Dry with a heat gun.
3. Stamp the Sailboat image again using Pale Ochre Archival Ink. Cut out the sails only. Stamp the large sail with the '31' from the Steampunk Rubber Stamp Set using Jet Black ink. Glue the sails over the first sailboat image.
4. Stamp the 'explorer' word from the Steampunk set using Jet Black ink. Cut out and add to the side of the boat. Stamp the compass from the Steampunk set and the ship's wheel and 'sail away' quote from the Sail Away set. Fussy cut each image and add to the card front with a circle of twine.
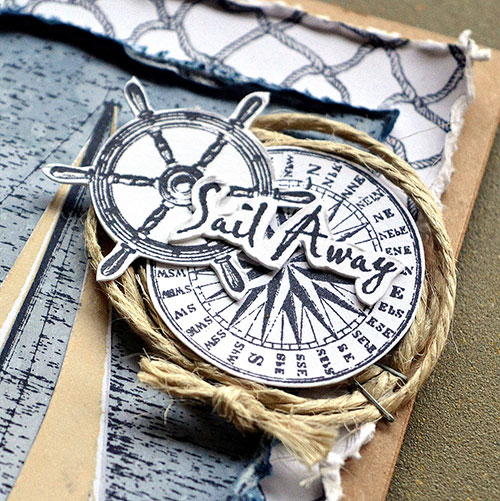
Don't you just love the texture and detail in Belinda's cards? Here's another one:
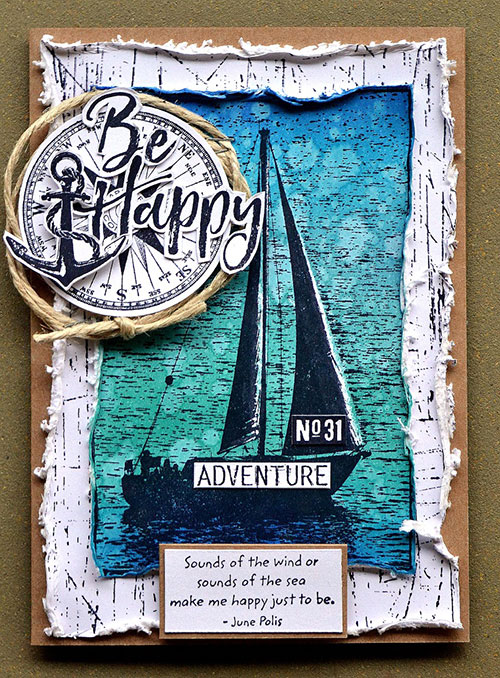
Instructions:
1. Apply the Scratches Background Stamp to smooth white cardstock using Jet Black Ranger Archival Ink. Distress the edges and stick down on a kraft cardstock card base.
2. Apply the Sailboat stamp onto another piece of white cardstock cut to size using the Jet Black ink. Colour over the highlighted areas of the image (ie. the sails), with a white crayon. Using an ink blending tool, apply Blueprint Sketch, Broken China, Mermaid Lagoon and Peacock Feathers inks. Flick some water over the top with your fingertips for a water stained look. Dry with a heat gun. Distress the edges and add to the card front.
3. Using Jet Black ink, stamp the compass, anchor, quote, sentiment, adventure and No 31. Fussy cut all images and add to the card front along with a circle of twine.
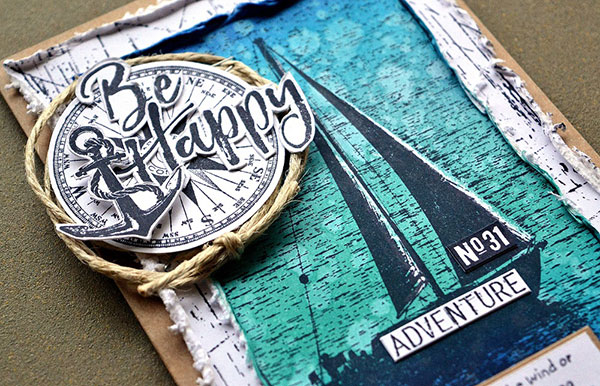
Next we have a card by Rachel Greig:
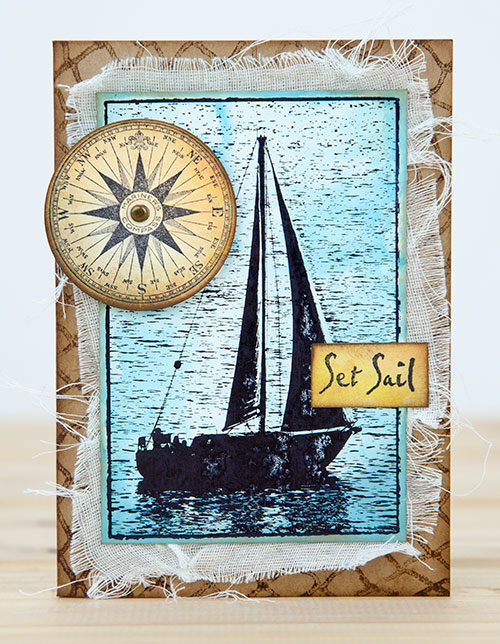
Instructions:
1. Stamp Fishing Net Background Stamp onto a kraft card using Archival Coffee inkpad. Sponge around the edges using the same ink.
2. Spritz some Tumbled Glass Distress Spray Stain onto a non-stick craft sheet. Lay a piece of gloss card face down into the spray and twist around. Lift up the glossy card and dry with a heat tool. Stamp the Sailboat onto the glossy card using Archival Jet Black ink. Lightly sponge around the edges using Vintage Photo Distress Ink.
3. Cut a piece of muslin a little larger than the stamped image. Adhere to card using multi medium. Adhere Sailboat image over the top using more multi medium.
4. Stamp the compass and Set Sail from the Sail Away Rubber Stamp set onto cream cardstock using Archival Jet Black ink and sponge with Vintage Photo Distress Ink. Adhere the compass to the card using an antique brad. Adhere the sentiment with foam adhesive.
Suzz Czosek has created a sun behind the sails! The Journey Word Block Stamp is a great way to create a background too:
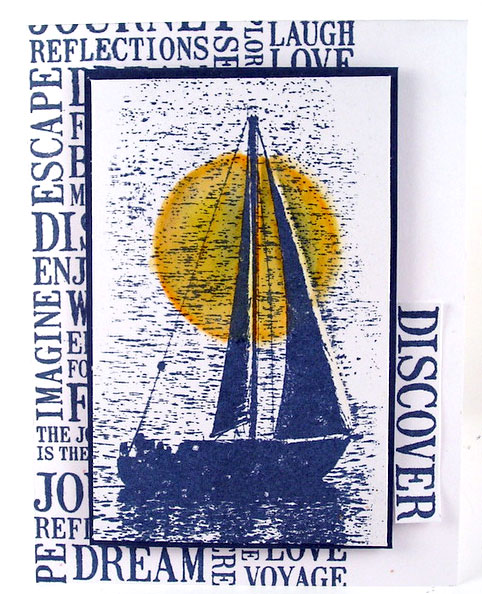
Instructions:
1. Stamp the Journey wordblock using blue ink on white cardbase.
2. Stamp sailboat on white cardstock. Cut to size.
3. Stamp the Journey wordblock on white cardstock and cut out the word discover.
4. Sponge circle of yellow and orange dye inks over sailboat.
5. Layer image on blue cardstock. Attach to cardstock using foam squares.
6. Attach sentiment along side of sailboat image.
If you need a quick birthday card, here's an idea from Robyn Wood:
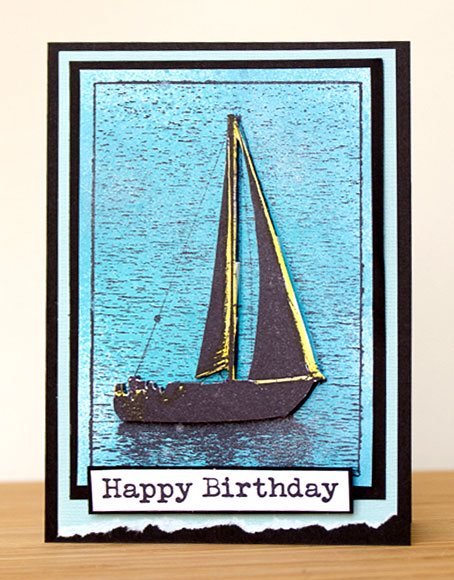
Instructions:
Spray a piece of cardstock with blue, shimmery spray ink, allow to dry well. Stamp with Stamp Darkroom Door Sailboat Photo stamp and trim image so that there is a narrow border on all sides. Layer with black cardstock, then pale blue with a torn bottom edge and attach to a black card front. Stamp Darkroom Door Sailboat Photo stamp onto white cardstock using black Archival ink. Add some yellow ink to the sail using markers and trim closely. Affix boat over Photo Stamp using foam tape. Stamp a greeting from the Darkroom Door Happy Birthday stamp set using black Archival ink and trim closely. Layer with black and affix to card with foam tape.
What could be better than a sail on a harbour under the setting sun? That was Robyn’s inspiration for this card. It uses the technique of crayon resist to give some highlights to the boat and water.
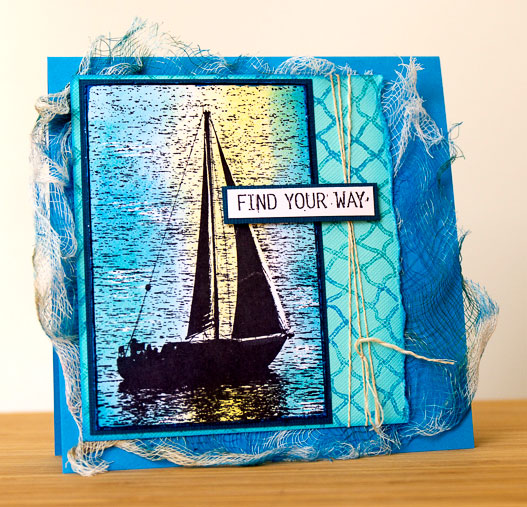
Instructions:
Stamp Darkroom Door Sailboat Photo stamp onto white cardstock using black Archival ink. Highlight parts of the image using a white crayon - sail edges and parts of the water to the right, left and below the boat. Carefully sponge with Squeezed Lemonade ink so that there is a trail of yellow running through the image. Sponge each side with Peacock Feathers but keep the colour patchy – the ocean isn’t a solid colour. Trim image closely, distress edges and layer with dark teal card stock. Stamp a piece of pale blue card with Darkroom Door Fishing Net Background stamp using Peacock Feathers ink. Tear the right hand side and ink all of the edges. Affix the sailboat image to the left hand side, tie with twine and layer onto card front with some coloured cheesecloth. The cheesecloth can be given a swish of colour with the Peacock Feathers ink pad. Stamp wording from Darkroom Door Discover stamp set onto white card using black ink and trim closely. Layer with dark teal and add to card front using foam tape.
Supplies Used:
Darkroom Door Sailboat Photo Stamp
Darkroom Door Fishing Net Background Stamp
Darkroom Door Scratches Background Stamp
Darkroom Door Seaside Vol. 2 Rubber Stamp Set
Darkroom Door Brushed Sentiments Rubber Stamp Set
Darkroom Door Steampunk Rubber Stamp Set
Darkroom Door Sail Away Rubber Stamp Set
Darkroom Door Happy Birthday Rubber Stamp Set
Darkroom Door Discover Rubber Stamp Set
Darkroom Door Journey Word Block Stamp
Ranger Archival Ink: Jet Black, Pale Ochre
Distress Ink: Stormy Sky, Weathered Wood, Vintage Photo, Mustard Seed, Dried Marigold, Blueprint Sketch, Broken China, Mermaid Lagoon, Peacock Feathers, Squeezed Lemonade
Distress Marker: Squeezed Lemonade
White crayon
Ink Blending Tool
Thanks for stopping by!
Sailboat Photo Stamp Ideas