- Products
- Blog
- Stockists
- About
- Contact
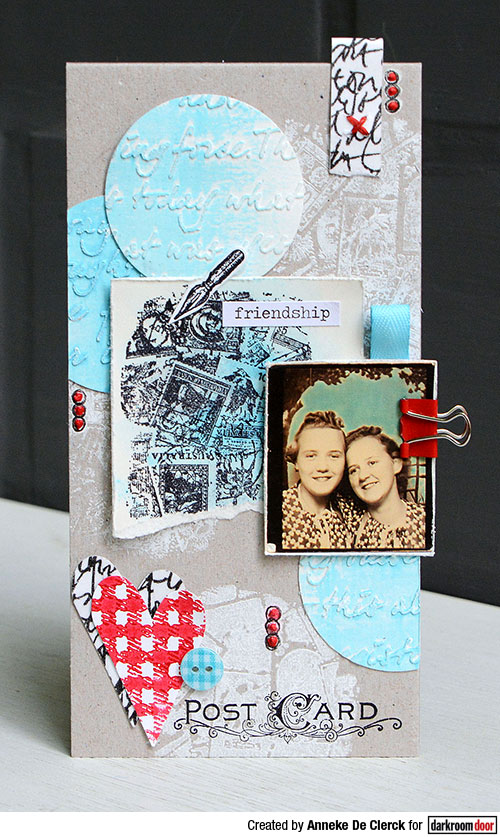
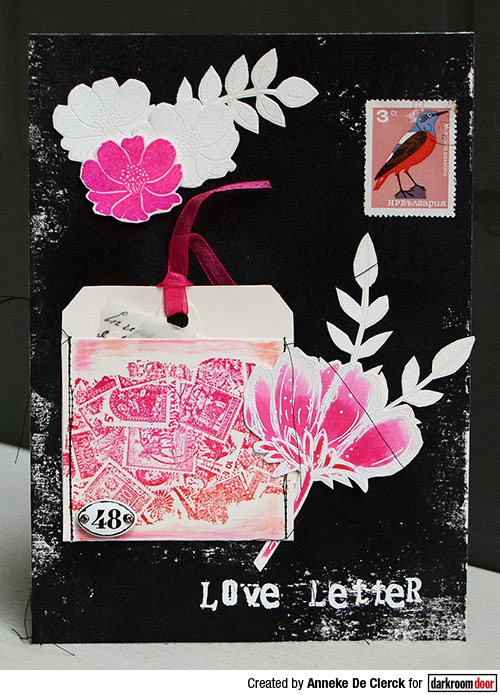
Hi, it’s Anneke here. Today I have two projects to share that I’ve made with the new Postage Stamps Texture Stamp. It’s a great stamp to use on correspondence themed cards/projects.

Instructions
1. Stamp the Postage Stamps Texture Stamp randomly on a grey board panel using white paint.
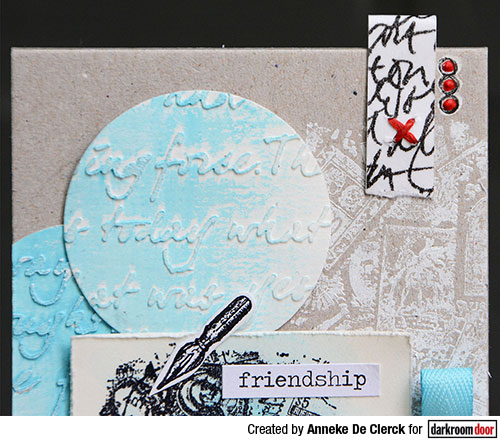
2. Put a stencil on a sheet of paper, apply light modeling paste through it. Punch 3 circles out of that paper and color with light blue paint.
3. Colour a scrap of watercolor paper with Distress Ink Broken China. Overstamp with the Postage Texture Stamp. Tear away the bottom of the print.
4. Colour an image from the Photobooth Friends & Lovers sheet using a Distress Marker. Put a piece of ribbon underneath.
5. Adhere strips of Dina Wakley Media tape to a scrap of paper. Punch a heart out of that paper. Make a tab using Dina Wakley tape. Sew a cross stich on top using red thread.
6. Make a print with the Plaid Texture Stamp using red paint. Punch a heart out of that print.
7. Arrange each item on the grey board and glue in place.
8. Make dots with red paint using a Needle Tip Applicator, add white and black accents with a pen.
9. Stamp text at the bottom with Archival Ink Jet Black.
10. Finish the panel off with a stamped pen, a chitchat sticker and a binder clip.

Supplies used:
Darkroom Door: Postage Stamps Texture Stamp
Darkroom Door: Plaid Texture Stamp
Darkroom Door: Correspondence Rubber Stamp Set
Darkroom Door: Photobooth Friends & Lovers
The Crafters Workshop stencil: Mini Art Is
Talens Amsterdam Acrylics: Titanium White, Sky Blue Light, Red
Distress Ink Pad: Broken China
Distress Marker: Broken China
Tim Holtz Idea-ology: Chitchat
Dina Wakley Media Tape

Instructions
1. Colour a 15 x 20 cm card panel with a brayer using black paint.
2. Stamp leaves and flowers with Versamark Ink. Heat emboss with white embossing powder. Heat emboss one of the Carved Flowers with fuchsia embossing powder. Colour the Scribbled Flower with Distress Ink Picked Raspberry using a water brush. Cut out flowers and leaves.
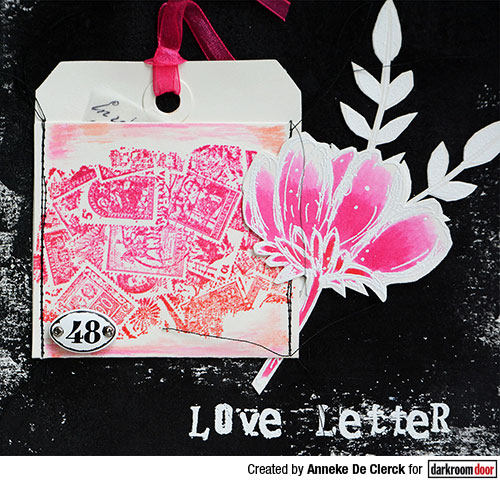
3. Fold a pocket from a size 9 tag, stamp the Postage Stamps Texture Stamp on the front using Distress Ink Ripe Persimmon and Picked Raspberry. Add some extra color with the same ink using a water brush. Close the pocket by machine stitching the edges. Attach number and ribbon.
4. Stamp parts of the French Script Background Stamp on 2 scraps of vellum and put these ‘letter’ inside the pocket.
5. Arrange each item on the panel and glue in place.
6. Stamp text straight on the panel with Versamark Ink and heat emboss with white embossing powder.
7. Finish off with a vintage post stamp.

Supplies used:
Darkroom Door Postage Stamps Texture Stamp
Darkroom Door Carved Flowers Rubber Stamp Set
Darkroom Door Carved Leaves Vol 1
Darkroom Door Fine Flowers Vol 2 Rubber Stamp Set
Darkroom Door Alphabet Medley Rubber Stamp Set
Darkroom Door French Script Background Stamp
Golden Fluid Acrylic: Carbon Black
Versamark Ink
WOW embossing powder: Opaque Bright White, Primary Fuchsia Fusion
Distress Ink: Picked Raspberry, Ripe Persimmon
Tim Holtz Idea-ology: Mini Plaquettes
Thanks for stopping by!
Anneke
Postage Stamps Texture Stamp Projects