- Products
- Blog
- Wholesale
- Stockists
- About
- Contact
Hi crafty folk! It's Teresa Abajo here with a couple of cards I made using the new Portrait Inchies Stamp Set. Before I show you those however, I wanted to address the dilemma these Inchies stamp set present to some of us - to cut or not to cut? I usually like to keep them as one complete sheet so they can be used as a background stamp or if I need only a few images I can still just ink up a smaller section and trim out the stamped images after they have been stamped. To stamp a full sheet you will need either a large block or a stamping tool that takes this large size.
However if you prefer them to be in smaller stamps, here is a compromise, if you cut them out by hand, this adds little curves and angles that can be used to put the stamp back together like a jig saw puzzle. Which means you can use them as a full background, a horizontal strip, a vertical strip and as individual images, depending on how you cut them. Another option is to cut the sheet in half (horizontally in the middle), so you have two stamps the same size as the Photo Stamps. So the choice is yours!
Now onto the cards:
This first one uses the set as a complete background for a large (A5) card:
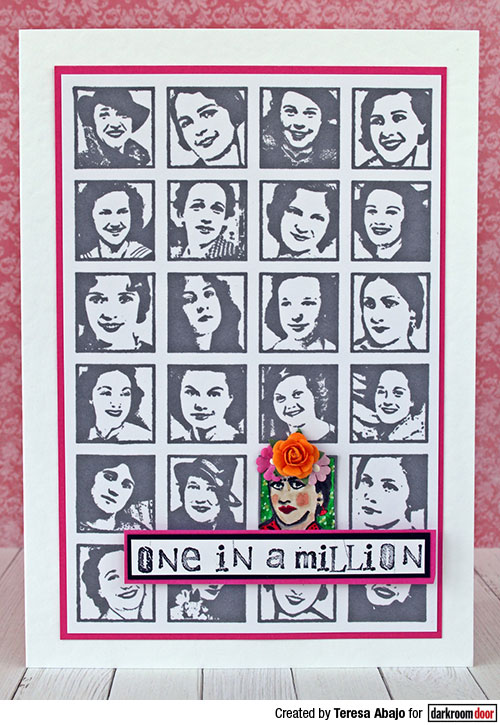
Instructions:
1. Stamp the entire stamp onto some white card using grey ink. Trim to size then mount onto pink cardstock.
2. Stamp one of the images again, and colour it using your preferred medium (I used acrylic paint and some Distress Inks).
3. Cut this image out and adhere it over one of the grey ones on the card front. Embellish with flowers.
4. Stamp the words using black ink, trim into a strip and mount it onto black then pink cardstock. Adhere to card front with foam tape.
5. Adhere the card front to a folded white card.
Supplies used:
Darkroom Door Portrait Inchies Rubber Stamp Set
Darkroom Door Alphabet medley Stamp Set
Archival ink: Watering Can, Jet Black
Acrylic paints
Distress Ink: Antique Linen, Tattered Rose
Cardstock: pink, black, white
Flowers
A5 folded white card
This second card uses a 3 x 3 panel of the inchie images. You can either cut the stamp up into this arrangement, or stamp it and then cut the cardstock.
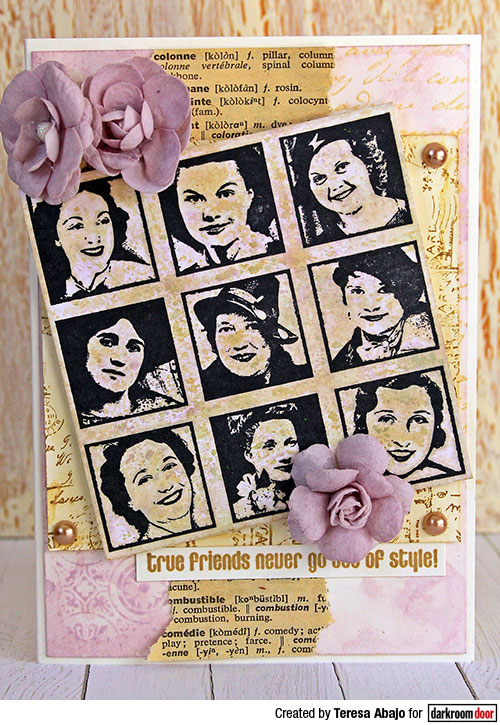
Instructions:
1. Spritz some Milled Lavender Distress Spray Ink onto a craft sheet and swipe some cream cardstock through it. Cut in half.
2. Spritz some Old Paper Distress Spray Ink onto a craft sheet and swipe one half of the cream cardstock through it. Dry well.
3. Stamp the Inchies onto this piece using black ink. Trim to size.
4. On the other piece of cream cardstock, stamp the Spanish Tiles Background Stamp in the bottom left hand corner using Milled Lavender Distress ink. Stamp the French Script Background using Old Paper Distress Ink. Adhere a strip of old dictionary page down the centre of the card front. Adhere this to a folded cream card.
5. Stamp the Postcards Texture Stamp onto a 9.5cm sqaure of cream cardstock using Brushed Corduroy Distress Ink. Adhere to card front.
6. Stamp the quote from 1920's Chic Stamp Set using brown ink and adhere to card front.
7. Adhere the 3 x 3 Inchie panel to the card front using foam tape. Embellish with pearls and flowers.
Supplies used:
Darkroom Door Portrait Inchies Rubber Stamp Set
Darkroom Door Spanish Tiles Background Stamp
Darkroom Door French Script Background Stamp
Darkroom Door Postcards Texture Stamp
Darkroom Door 1920's Chic Stamp Set
Distress Spray Ink: Milled Lavender, Old Paper
Distress Ink: Milled Lavender, Old Paper, Brushed Corduroy
Archival Ink: Jet Black, Tree Branch
Old dictionary page
Adhesive pearls
Flowers
Cream cardstock
A6 folded cream card
Thanks for joining me today!
Teresa
Portrait Inchies Cards