- Products
- Blog
- Stockists
- About
- Contact
Hello stampers, it’s Robyn Wood with you today sharing some projects using the new Paris Filmstrip stamp. It is wonderful to see Filmstrip images return to the Darkroom Door product range, the card strips were always among my favourites and I love seeing them in stamps. Let me show you some ideas for using the Paris Filmstrip:

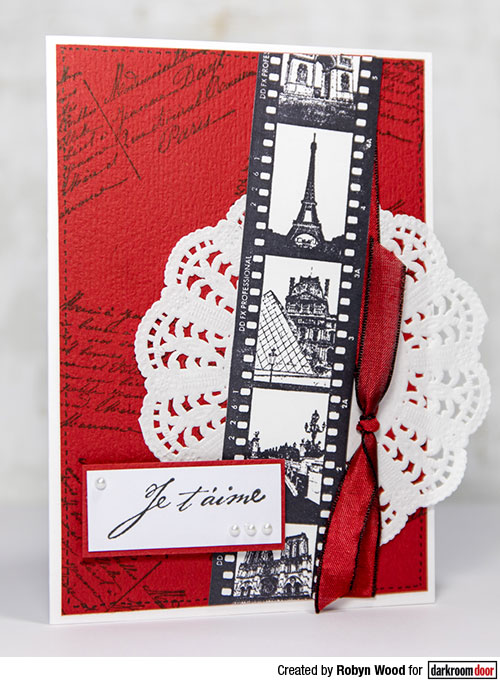
The Paris Filmstrip makes for a striking card if stamped simply in black and left uncoloured.
Instructions:
1. Stamp Paris Filmstrip onto white card using black Archival ink. Trim closely around the whole stamp, leaving images intact.
2. Stamp a panel of red cardstock all over with the French script from the Tour Eiffel stamp set using black Archival ink.
3. Add a line of faux stitching around the edge of the red panel using a fine, black pen.
4. Layer the right side of the panel with a small doyley and tie with ribbon.
5. Attach Paris Filmstrip image over the doyley/ribbon – arrange at slight angle. Trim off the parts of the image which overhang the red card. Attach to white card base.
6. Stamp Je t’aime from the same set onto white card using black Archival ink. Trim closely and layer with red card. Attach to card using foam tape and embellish with small, white pearls.
Supplies used:
Darkroom Door Paris Filmstrip Stamp
Darkroom Door Tour Eiffel Stamp Set
Archival ink: Jet Black

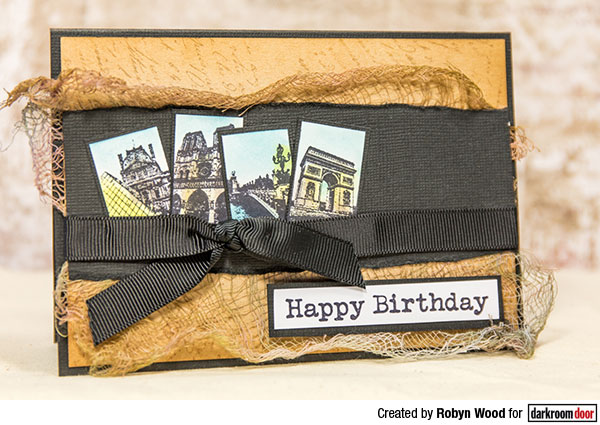
Don’t forget that the Paris Filmstrip images are awesome to use on their own, trimmed of the filmstrip framing and this card is one idea for you to try.
Instructions:
1. Stamp a panel of kraft cardstock randomly with the French Texture stamp using Pumice Stone Distress Ink. Sponge edges with Walnut Stain Distress Ink.
2. Stamp Paris Filmstrip onto white card using black Archival ink and cut images apart.
3. Give stamped images some colour by sponging with Distress Inks and layer with black cardstock.
4. Colour a small piece of cheesecloth using Distress Inks then attach to bottom section of kraft panel.
5. Add a strip of torn black cardstock over the cheesecloth then arrange layered images in a group. Tie a length of black ribbon across the kraft panel so it sits just over the bottoms of the images. Attach panel to black card base.
6. Stamp Happy Birthday greeting onto white card using black Archival ink and trim closely. Layer with black cardstock and add to cardfront to finish.
Supplies used:
Darkroom Door Paris Filmstrip Stamp
Darkroom Door Tour Eiffel Stamp Set
Darkroom Door Happy Birthday Stamp Set
Distress Ink: Pumice Stone, Walnut Stain

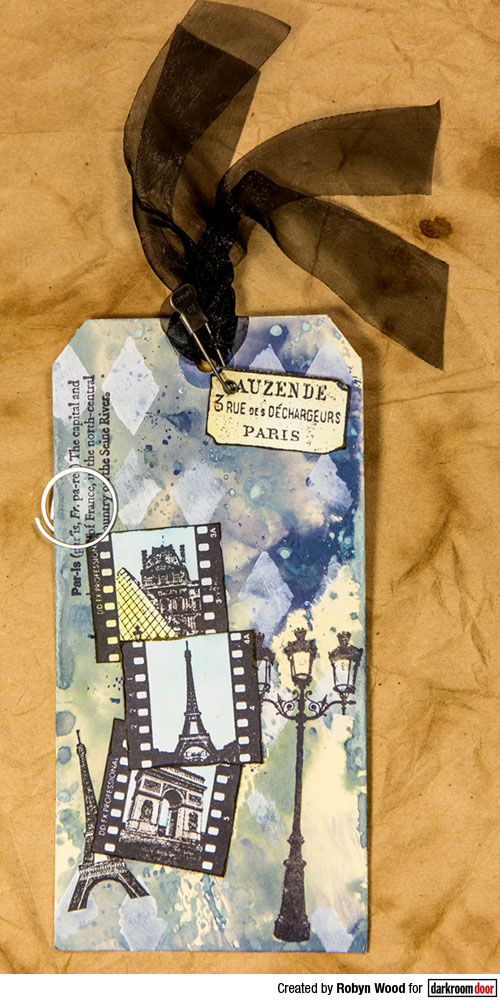
Decorated tags make great embellishments for journal pages & handy to add to a travel diary. The Paris Filmstrip image easily cuts apart giving you little postcard type images that hit the high points of a visit to Paris.
Instructions:
1. Add some colour to a manilla tag using Distress Oxide inks. Start by smooshing some inks onto a non-stick craft mat, spritz with a little water and drag the tag through the ink until you are happy with the effect.
2. Stencil parts of the tag using the Diamonds stencil and white gesso.
3. Stamp the tag with the Paris definition and lights from the Tour Eiffel stamp set using black Archival ink.
4. Stamp the small Eiffel Tower and street sign from the same set onto cardstock using black Archival ink.
5. Stamp Paris Filmstrip onto white card using black Archival ink and cut images apart.
6. Give stamped images some colour by sponging with Distress Inks. Distress edges lightly and sponge with brown Distress ink.
7. Layered stamped images onto tag, set the Filmstrips images at slight angles for interest.
8. Add a round paperclip over the Paris definition. Add some ribbon to the top of the tag and attach street sign using a Tim Holtz Trinket Pin.
Supplies used:
Darkroom Door Paris Filmstrip Stamp
Darkroom Door Tour Eiffel Stamp Set
Darkroom Door Large Stencil: Diamonds
Dina Wakley Gesso - white
Distress Oxide ink: Frayed Burlap, Chipped Sapphire, Weathered Wood
Distress Ink: Walnut Stain, Old Paper, Squeezed Lemonade, Tumbled Glass
I hope you have enjoyed learning how these projects came together!
Until next time,
Robyn
Paris Filmstrip Projects