- Products
- Blog
- Stockists
- About
- Contact
Hi there! We have lots of great projects to share with you today using the Lighthouse Photo Stamp!
First we have two cards by Rachel Greig:
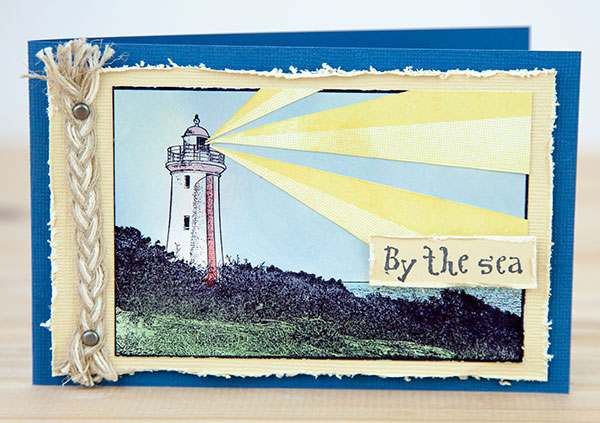
Instructions:
1. Stamp Lighthouse onto white gloss card using Jet Black Archival Ink. Colour image by sponging Distress Inks over the image. I used Mowed Lawn and Tumbled Glass.
2. Use a Barn Door Distress Marker to colour in the stripe and some of the details on the Lighthouse.
3. Stamp the Sunshine Background Stamp onto white cardstock using Chrome Yellow Archival Ink. Trim out some of the sun rays and adhere them to the Lighthouse to create a light beam.
4. Stamp 'By The Sea' from Seaside Vol 1 Rubber Stamp Set onto cream card and distress the edges with a paper distresser. Adhere to image.
5. Adhere Lighthouse to cream card and distress the edges with a paper distresser. Attach plait rope to left side with two antique brads. Adhere entire panel to folded blue card.
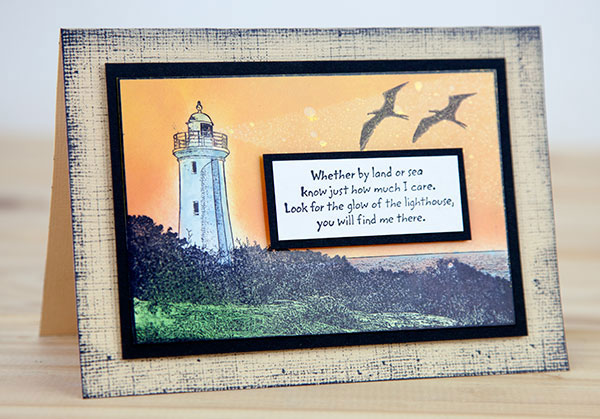
Instructions:
1. Stamp Lighthouse onto white gloss card using Jet Black Archival Ink. Colour image by sponging Distress Inks over the image. I used Mowed Lawn, Storny Sky, Tumbled Glass, Squeezed Lemonade and Ripe Persimmon.
2. Stamp two flying birds from the Love Birds Stamp Set using Jet Black Archival Ink.
3. Stamp quote from Seaside Vol 1 Rubber Stamp Set onto white card and mount with black cardstock.
4. Adhere quote over Lighthouse image using foam adhesive. Adhere entire stamped panel to black cardstock then to a folded tan coloured card. Tap the Jet Black Archival Ink around the edges of the card to create some added texture.
Belinda Spencer has created two amazing cards with lots of little details:

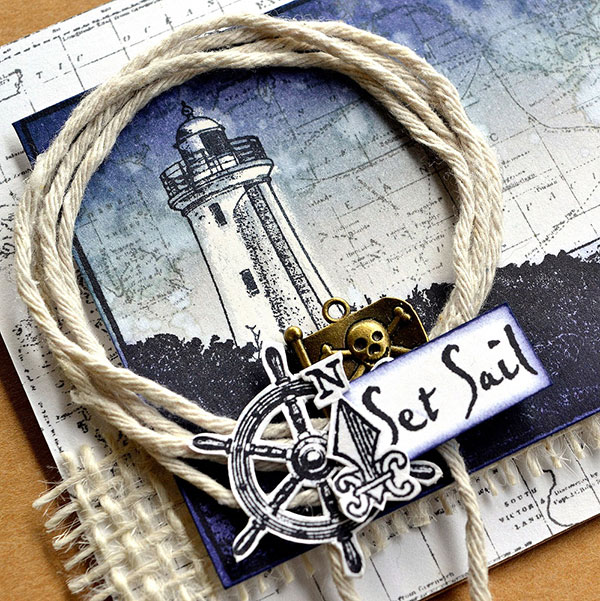
Instructions:
1. Apply Watering Can Ranger Archival Ink to the World Map Background Stamp and stamp on a piece of smooth white cardstock cut to size. Add to a kraft cardstock card base. Add a strip of hessian across the bottom of the card.
2. Apply the Lighthouse stamp to another piece of white cardstock using Jet Black Archival Ink. Stamp it again on a piece of scrap printer paper. Cut away all of the negative space and use the lighthouse section as a mask over the cardstock stamped image. Now apply the World Map stamp over the top using Watering Can ink. Remove the mask.
3. Colour over the lighthouse with a white crayon to create a crayon resist effect. Next apply Distress Inks in Weathered Wood, Stormy Sky and Chipped Sapphire with an ink blending tool. Buff over the lighthouse image with paper towel to remove any ink residue. Flick some water droplets at the image using your fingers to create a water stained look. Allow to dry. Add to the card front using 3D foam.
4. Add a circle of twine around the lighthouse image. Add a metal jolly roger charm. Stamp the ship’s wheel, the North symbol and the Set Sail quote using Jet Black ink. Fussy cut and add to the bottom of the twine circle.
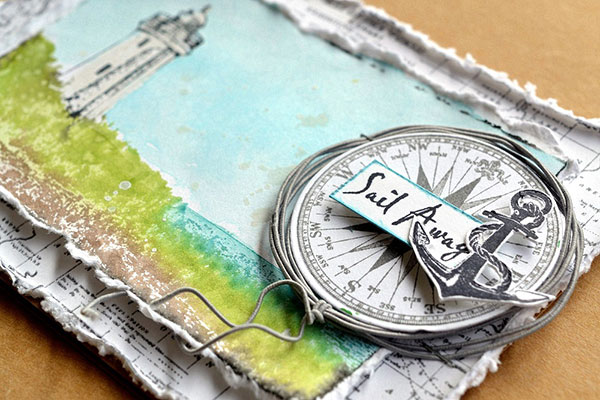
This next card shows how beautiful the Lighthouse can look by using a softer colour palette. I love how this looks!
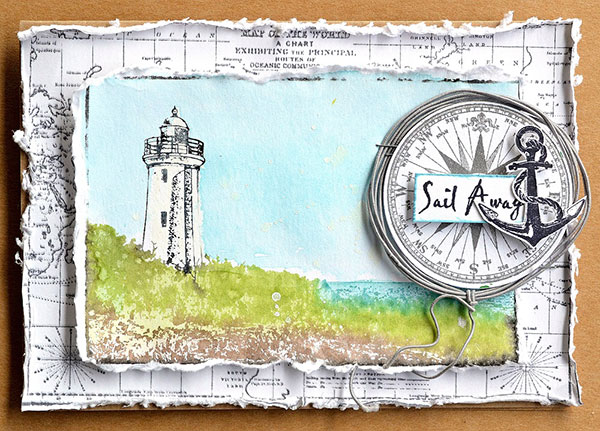
Instructions:
1. Apply Watering Can Ranger Archival Ink to the World Map Background Stamp and stamp on a piece of smooth white cardstock cut to size. Add to a kraft cardstock card base.
2. Apply Faber-Castell Stamper's Big Brush Pens to the Lighthouse Stamp. The colours used in the example are: May Green 170, Cobalt Green 156, Nougat 178 and Black 199. Lightly spritz the coloured stamp with water and stamp onto a piece of smooth white cardstock cut to size. Dry with a heat gun.
3. Colour over the lighthouse with a white crayon to create a crayon resist effect. Next squish a Tumbled Glass Distress Ink onto an acrylic stamping block. Dilute with water and wash over the background of the stamped image using a soft, wet paintbrush. Allow to dry.
4. Apply the Watering Can ink to the compass stamp from the Sail Away Rubber Stamp Set and stamp on a scrap of white cardstock. Cut out and add to the right hand side of the Lighthouse piece. Staple a circle of grey wire thread around the compass. Add this whole piece to the card front using 3D foam.
5. Stamp the anchor and quote using Jet Black Archival Ink. Fussy cut and add to the card.
Supplies Used:
Darkroom Door Lighthouse Photo Stamp
Darkroom Door Sunshine Background Stamp
Darkroom Door World Map Background Stamp
Darkroom Door Sail Away Rubber Stamp Set
Darkroom Door Seaside Vol 1 Rubber Stamp Set
Darkroom Door Love Birds Rubber Stamp Set
Ranger Archival Ink: Jet Black, Watering Can, Chrome Yellow
Distress Ink: Chipped Sapphire, Stormy Sky, Weathered Wood, Tumbled Glass, Mowed Lawn, Squeezed Lemonade, Ripe Persimmon
Distress Marker: Barn Door
White Crayon
Faber Castell Stamper's Big Brush Pens
Our next card was created by Godelieve Tijskens:
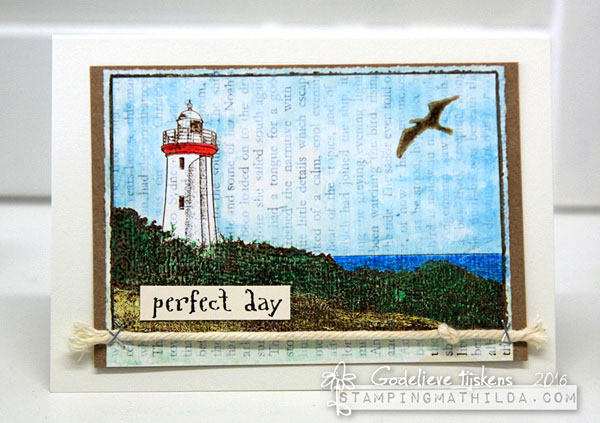
Instructions:
• I applied a layer of Gesso onto bookpaper
• I stamped the Lighthouse Photo Stamp with brown Archival Ink
• Then I noticed the word "Sydney" landed on the lighthouse :)
• I used diluted Distress Paints to color the sky, water and shrubs
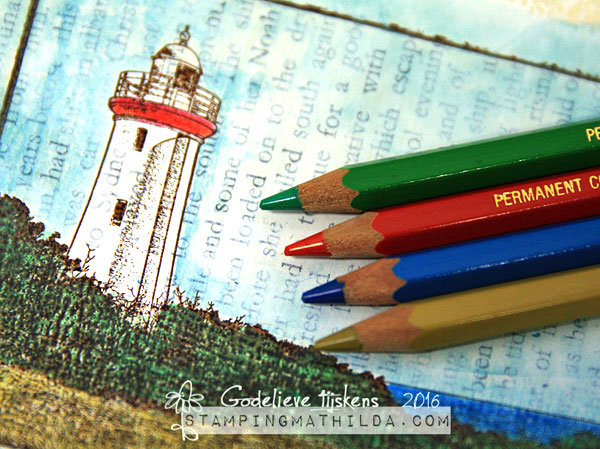
• To get more intense colors I also used pencils
• A bird from the Love Birds set was stamped with Archival Ink Potting Soil
• I embellished with a word from the Seaside Wordstrips and some twine, and assembled the card.
Suzz Czosek has created two cards showing two different ways the Lighthouse can be used:
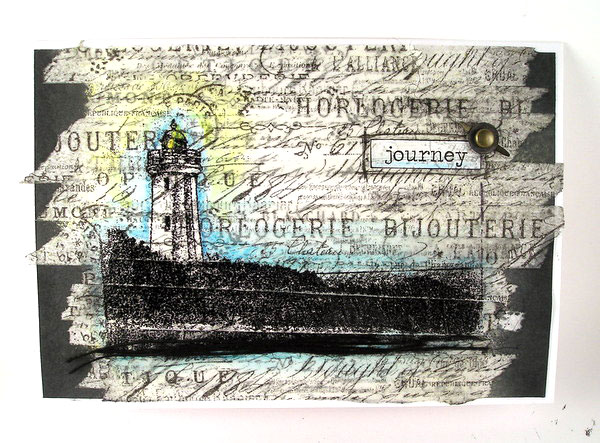
Instructions:
1. Cover a piece of white cardstock with strips of tissue tape.
2. Spray edges with Black Soot Distress Spray Stain. Let dry completely.
3. Stamp Lighthouse Photo Stamp using Jet Black Archival Ink.
4. Heat emboss image using black embossing powder.
5. Color around the image using watercolor pencils and waterbrush.
6. Add word sticker and frame with hand drawn frame. Add metal embellishment.
7. Mount image on card front.
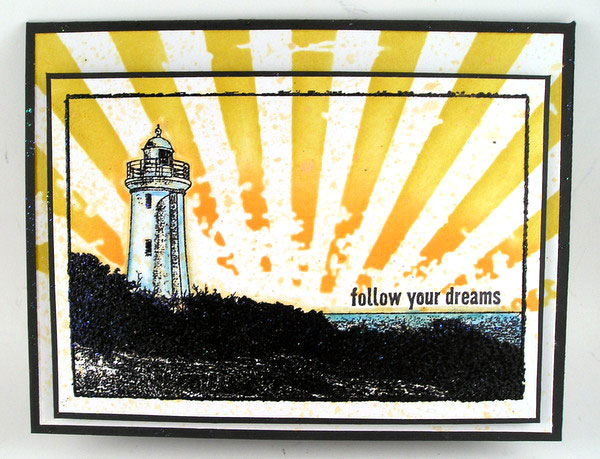
Instructions:
1. Stamp Lighthouse Photo Stamp on scrap paper to create mask.
2. Stamp Lighthouse Photo Stamp using Jet Black Archival Ink on white cardstock.
3. Cut out image to fit on front of card.
4. Lay cut out image on card base.
5. Mask lighthouse to prevent color from being sponged into lighthouse.
6. Sponge yellow ink over sunburst stencil onto main image and card front.
7. Mount main image onto black cardstock.
8. Stamp sentiment from New York Vol 1 Rubber Stamp Set.
9. Add color to lighthouse and water using waterbrush and distress ink.
10. Assemble layers on black card base.
Supplies Used:
Darkroom Door Lighthouse Photo Stamp
Darkroom Door Love Birds Rubber Stamp Set
Darkroom Door New York Vol 1 Rubber Stamp Set
Darkroom Door Seaside Wordstrips
Archival Inkpad: Potting Soil
Distress Ink: Mustard Seed, Spiced Marmalade, Tumbled Glass
Distress Paint: Salty Ocean, Broken China, Cracked Pistachio
Distress Spray Stain: Black Soot
Ranger Black Embossing Powder
Aquash Brush
Tim Holtz Tissue Tape
Tim Holtz Stencil
Talens Amsterdam Gesso
Colored Pencils
Tiny Attacher
Twine
Bookpaper
Thanks for stopping by today!
Lighthouse Photo Stamp Project Ideas