- Products
- Blog
- Wholesale
- Stockists
- About
- Contact
Hi, it’s Belinda Spencer here today to share a couple of wintery Christmas Cards featuring the stunning Glass Dome Frame Stamp. I have tried to create the look of a snow globe for these cards because who doesn’t love a snow globe! I do!
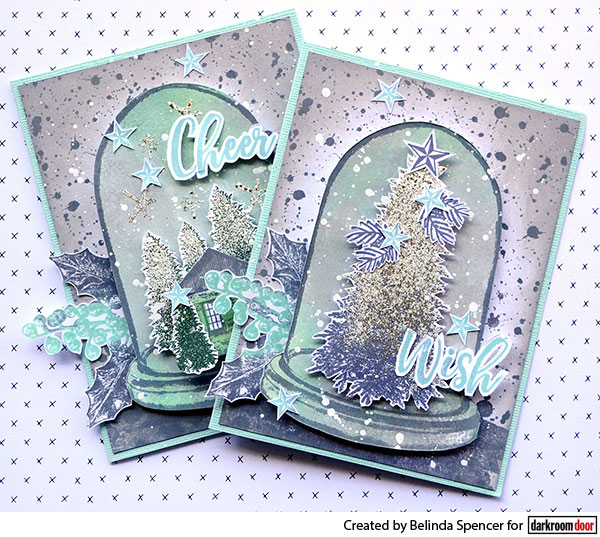
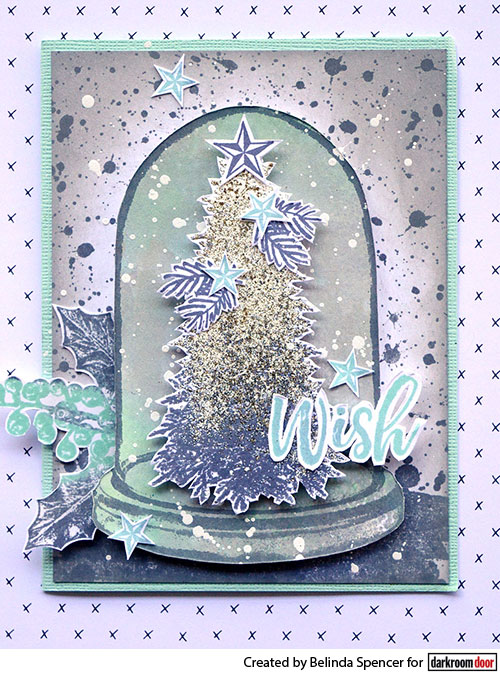
Here’s a closer look at the first card:
Instructions:
1. Cut a piece of aqua cardstock measuring 14 x 21cm. Fold in half to form the card base.
2. Cut a piece of smooth white cardstock measuring 10 x 13.5cm. Using Watering Can Archival Ink, apply the Splatter Background to this piece. Apply a stamp from the Watery Washes Stamp Set to the bottom of this piece using the same Watering Can ink. Dry the ink with a heat gun. Apply Hickory Smoke Distress Oxide around the edges using an ink blending tool. Stick down on the card base.
3. Take another piece of smooth white cardstock large enough to accommodate the Glass Dome Frame Stamp. Apply Cracked Pistachio and Hickory Smoke Distress Oxides to a heat resistant craft sheet. Spritz liberally with water and then swipe the cardstock through the colour. Dry with a heat gun and then reapply until you are happy with the result. Clean the craft sheet and then apply Picket Fence Distress Ink. Spritz with water and swipe the same piece through this. Again continue until you are happy with the result remembering to dry in between each application.
4. Stamp the Glass Dome on this piece using the Watering Can Archival Ink. Dry the ink with a heat gun and then cut out the dome.
5. Use a stamping platform to apply the large Christmas tree from the Yuletide Vol 1 Stamp Set to an extra piece of smooth white cardstock using Olive Archival Ink. Remove this piece from the stamping platform and dry with a heat gun. Place this piece back on the platform in the same position and stamp the tree again using embossing ink. Remove from the platform and heat set with Shabby White Embossing Enamel. Fussy cut the tree and add to the glass dome with 3D foam. Add the glass dome to the card front using 3D foam also.
6. Stamp some small stars from the Stars Stamp Set using Viridian Archival Ink. Stamp a slightly larger star using the Watering Can ink. Also stamp the leaves from the Merry Christmas Stamp Set twice using the Watering Can Ink. Stamp the sentiment using the Viridian ink. Stamp the holly leaves from the Yuletide Vol 1 Stamp Set using both the Viridian and Watering Can inks. Fussy cut all elements and add to the card front.
7. Use a white paint pen to flick ‘snow’ over the surface of the card.

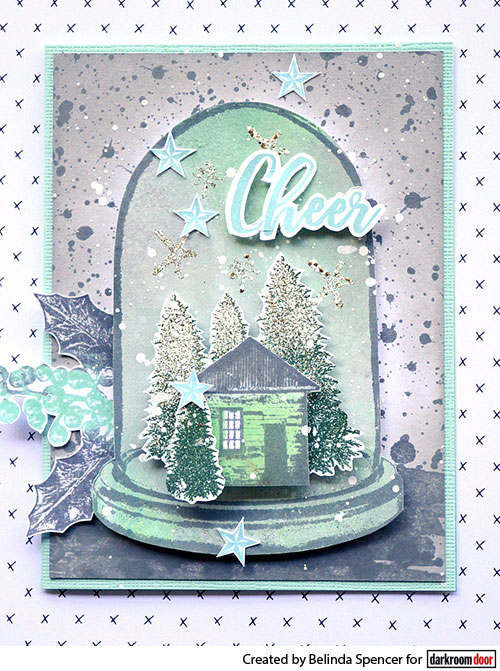
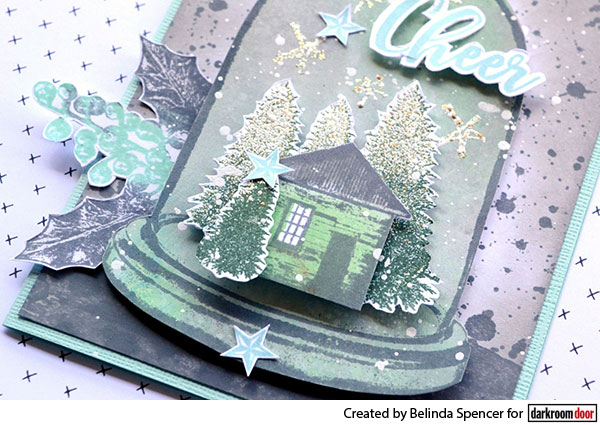
Here’s another card I created in the same manner including a sweet little wintery scene.
Supplies used:
Darkroom Door Glass Dome Frame Stamp
Darkroom Door Splatter Background Stamp
Darkroom Door Yuletide Vol 1 Rubber Stamp Set
Darkroom Door Home Sweet Home Rubber Stamp Set
Darkroom Door Merry Christmas Rubber Stamp Set
Darkroom Door Stars Rubber Stamp Set
Darkroom Door Watery Washes Rubber Stamp Set
Darkroom Door Season’s Greetings Rubber Stamp Set
Darkroom Door Christmas Trees Rubber Stamp Set
Archival Ink: Viridian, Watering Can
Distress Embossing Ink
Distress Ink Picket Fence
Distress Oxide: Cracked Pistachio, Hickory Smoke
Stampendous Shabby White Embossing Enamel
I hope you love the fabulous Glass Dome Stamp as much as I do. The fun is in finding which stamps you can fit inside!
Thanks so much for stopping by the blog today.
Cheers
Belinda
Glass Snow Dome Christmas Cards