- Products
- Blog
- Stockists
- About
- Contact
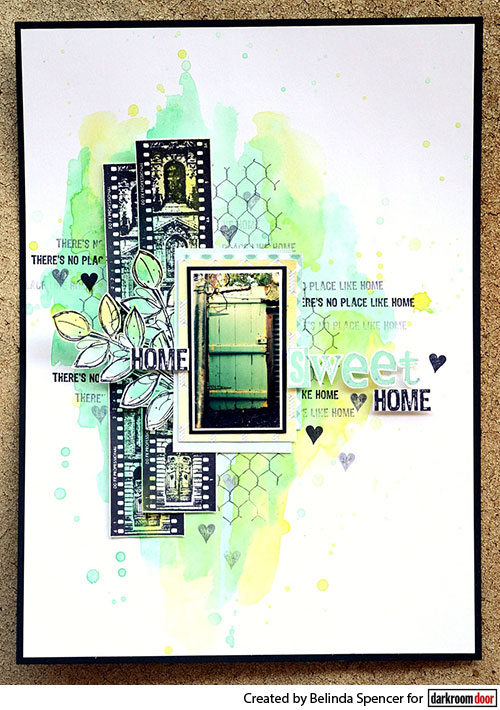
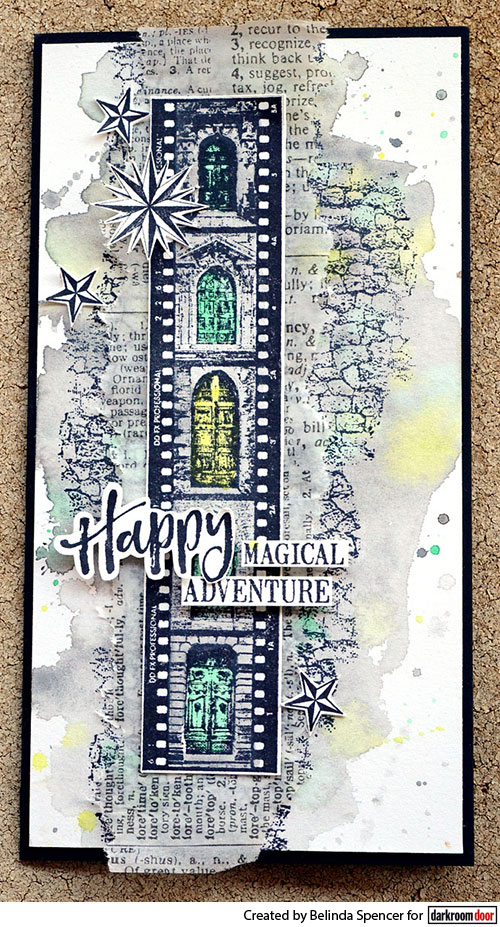
Hello, It’s Belinda Spencer here with you today to share a layout and card featuring the fabulous new ‘Doors’ Filmstrip Stamp. This is such a fun stamp to add the perfect detail to layouts, cards, art journals and more. Check out how I have made this stamp the feature of both my layout and card.
Instructions:
1. Crop a piece of black cardstock to 8½” x 11¾” to form the base of the layout.
2. Crop a piece of smooth white cardstock to 8¼” x 11½”. Stick down on the black cardstock base.
3. Spritz the layout with water and use a soft wet paintbrush to drift some watercolour paint over the surface in colours of your choice. Flick some droplets of colour over the page too. Set aside to dry.
4. Apply the new Chicken Wire Texture Stamp over the background in several places using Watering Can Archival Ink. Stamp a quote from the Home Sweet Home Stamp Set as well as some hearts from the Hello Baby Vol. 1 Stamp Set using Jet Black Archival Ink.
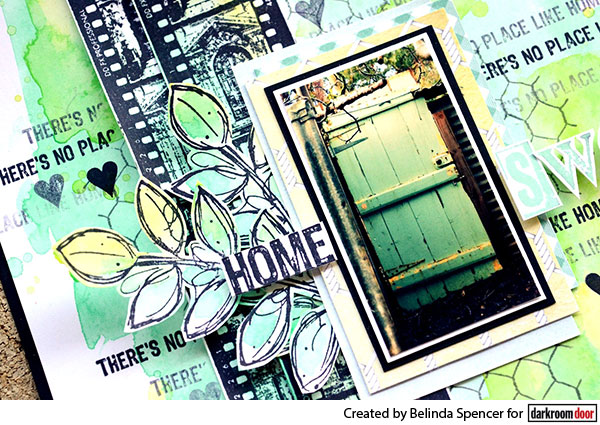
5. Stamp the Doors Filmstrip Stamp twice on some extra smooth white cardstock using the Jet Black ink. Colour the filmstrip using the same watercolour paints as the background. Also stamp two leafy twigs from the Fine Leaves Stamp Set using the same ink. Colour the leaves with the watercolours also. Set aside to dry or use a heat gun to speed things up. Fussy cut all elements and add to the layout.
6. Add your photo to the layout. Stamp the title and add that along with any other embellishments you would like.
Supplies used:
Darkroom Door Doors Filmstrip Stamp
Darkroom Door Chicken Wire Texture Stamp
Darkroom Door Alphabet Medley Rubber Stamp Set
Darkroom Door Hello Baby Vol. 1 Rubber Stamp Set
Darkroom Door Home Sweet Home Rubber Stamp Set
Darkroom Door Fine Leaves Rubber Stamp Set
Archival Ink: Jet Black, Viridian, Watering Can
Jane Davenport Watercolour Paints
Instructions:
1. Crop a piece of black cardstock to 21.5cm x 23cm. Fold in half to form the card base.
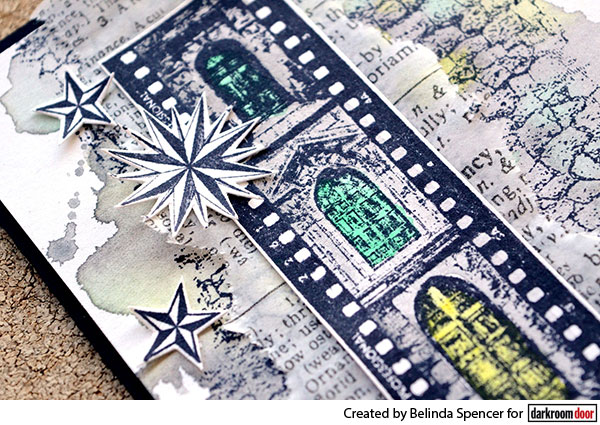
2. Crop a piece of watercolour paper to 11cm x 21cm. Spritz with water and apply watercolour paint with a soft wet paintbrush. Here I have used a lovely soft grey and then flicked over some aqua and yellow. Set aside to dry completely.
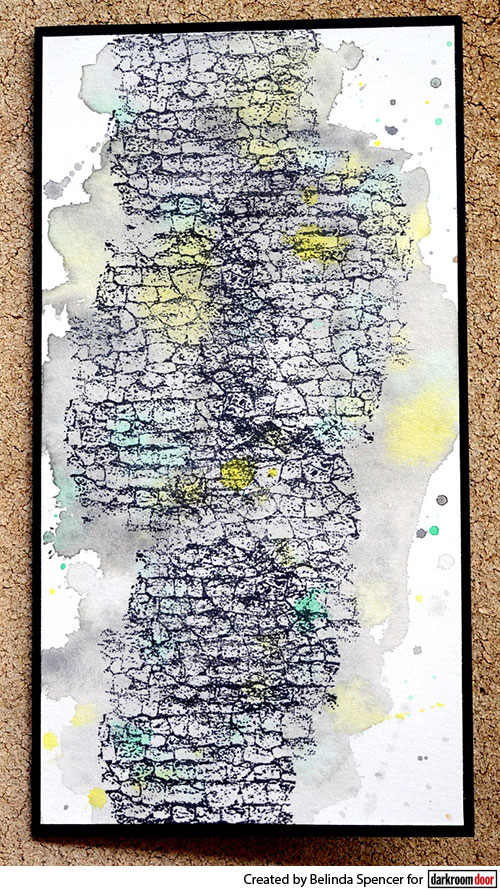
3. Apply Jet Black Archival Ink to the Stone Texture Stamp. Stamp repeatedly over the card background as per the example below.
4. Apply the Jet Black ink to the Doors Filmstrip Stamp. Stamp on an extra piece of watercolour paper. Dry the ink with a heat gun and then colour with the same watercolour paints. Set aside to dry completely before cutting out the strip.
5. Tear a strip of printed tissue paper or Tim Holtz Tissue Wrap. Stick the filmstrip on this piece. Stick down on the card front.
6. Stamp some stars and the sentiment on a piece of smooth white cardstock using the Jet Black ink. Cut out and add to the card front.
Supplies used:
Darkroom Door Doors Filmstrip Stamp
Darkroom Door Stone Texture Stamp
Darkroom Door Journey Word Block Stamp
Darkroom Door Discover Rubber Stamp Set
Darkroom Door Stars Rubber Stamp Set
Darkroom Door Brushed Sentiments Rubber Stamp Set
Archival Ink Jet Black
Tim Holtz Tissue Wrap – Terminology
Jane Davenport Watercolour Paints
I hope you are feeling inspired to create your own beautiful projects using this fabulous stamp.
Thanks for stopping by the blog today.
Belinda
Doors Filmstrip Layout and Card