- Products
- Blog
- Stockists
- About
- Contact
Hello! Today we are sharing projects using the Cup Of Tea Rubber Stamp Set! This stamp set has a special meaning as the teapot was originally owned by my Grandma Greig. Every time we visited Grandma and Grandpop we'd all sit down for a cup of tea with scones or cake and listen to their stories. This teapot now resides in my kitchen and it's so nice to now have it in stamp form and share it with you!
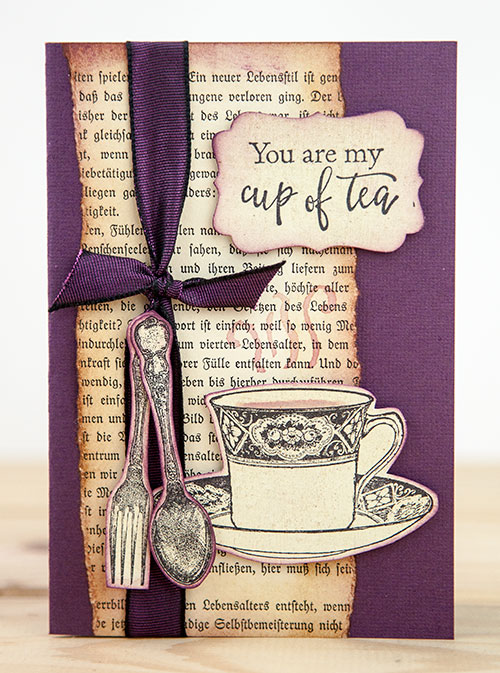
Here's a card I have created using the teacup and cutlery stamps:
Instructions:
1. Stamp the fork, spoon and teacup onto natural paper using Archival Jet Black inkpad. Trim around each image and lightly sponge with Seedless Preserves Distress Ink.
2. Stamp the sentiment onto a punched label and ink the edges with Seedless Preserves Distress Ink.
3. Tear a piece of bookpaper and adhere to a folded purple card. Sponge the edges with Seedless Preserves Distress Ink.
4. Wrap purple ribbon around the left side of the card and tie in a knot at the front. Adhere the fork and spoon using foam adhesive. Adhere the teacup and label using foam adhesive.
5. Using an aquash brush, lightly draw steam lines with Seedless Preserves Distress Ink.
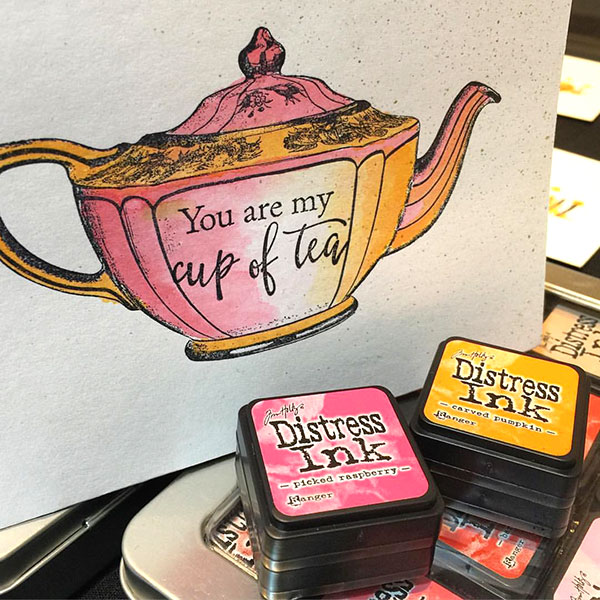
This is a sample piece I created during the Sydney Stitches & Craft show. I used both Picked Raspberry and Carved Pumpkin Distress inks with an aquash brush to colour the teapot.
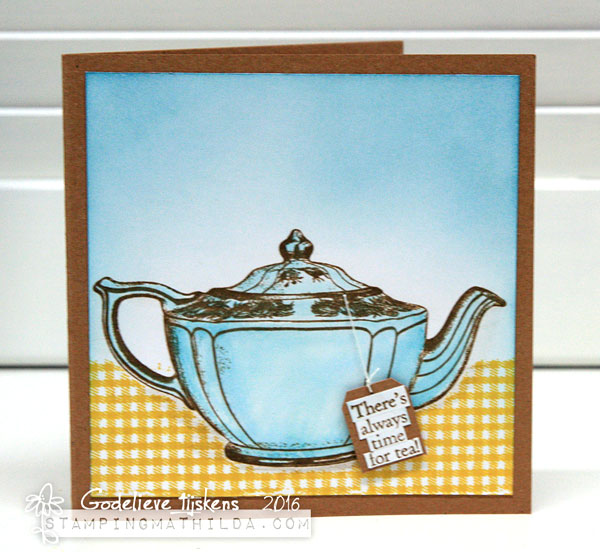
Here are some projects by Godelieve Tijskens:
Instructions:
1. Stamp the teapot onto smooth watercolor paper, using Archival Ink Potting Soil
2. Create a mask for the teapot: stamp the pot onto copy paper and cut it out.
3. To stamp the Plaid Background at the bottom, cover the top part with copy paper or a sticky note, and cover the pot with the mask.
4. Stamp the Plaid Background with Archival Ink Saffron. Remove the masks
5. Watercolor the teapot with Distress Ink Broken China. Let dry
6. Use an ink blending tool and Distress Ink to sponge around the teapot.
7. Stamp the words with Archival Ink Potting Soil. Cut the words apart and glue them onto a handcut label.
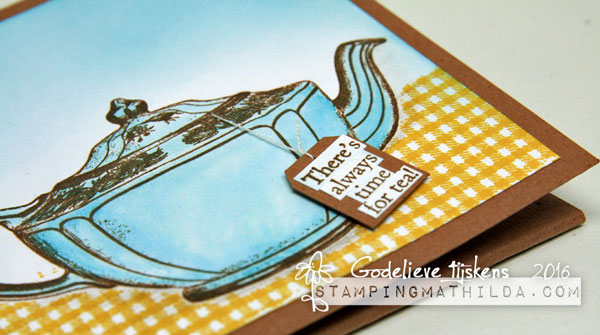
8. Attach the label to the teapot using a needle and thread
9. Glue the stamped piece onto a folded card:
10. Create a pocket inside the card. Decorate the pocket with a stamped spoon and put a teabag inside the pocket
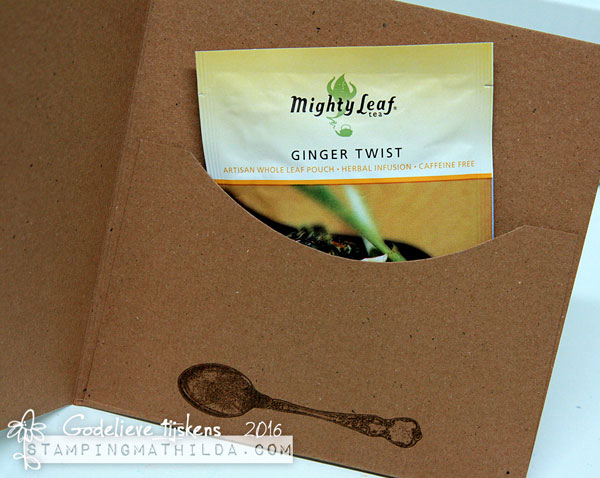
What a great little gift to send to a tea loving friend! Here are more projects by Godelieve:

Instructions:
1. Stamp the cup and words on colored cardstock using Versamark ink. Heat emboss with burgundy WOW embossing powder. Cut the cup and words out. Heat emboss the edges around the saying.
2. Stamp the spoon with Versamark ink, heat emboss with silver embossing powder and cut out.
3. Stamp the Floral Background with Versamark ink onto 2 pieces of white cardstock, heat emboss with white and burgundy embossing powder.
4. To put the spoon in the cup, make a small cut using a craft knife.
5. Arrange all pieces onto a burgundy card.
Here are a set of ATC's:

Instructions:
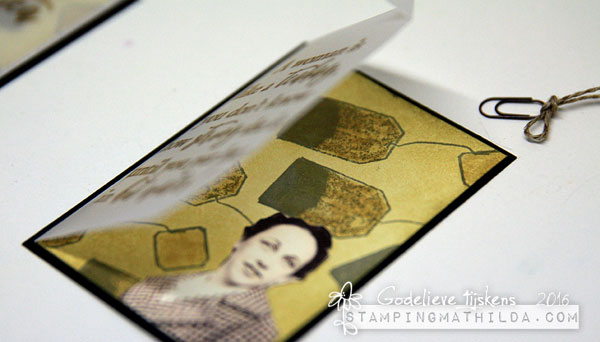
1. Create a background by stamping the teabag several times onto white cardstock, using Archival Ink Watering Can.
2. Use a Distress Marker to color the teabags
3. Sponge the paper with Distress ink Scattered Straw
4. Glue 2 cut out photobooth images onto the teabag backgrounds
5. Stamp the words onto vellum, using Archival Ink Potting Soil.
6. Cover the ATCs with the stamped vellum and mat with black cardstock
7. Embellish the ATCs with a mini paper clip and a bit of twine
Supplies used:
Darkroom Door Cup Of Tea Rubber Stamp Set
Darkroom Door Plaid Background Stamp
Darkroom Door Floral Background Stamp
Darkroom Door Photobooth Ladies
Archival Inkpads: Potting Soil, Saffron, Watering Can
Distress Inkpad: Broken China, Carved Pumpkin, Picked Raspberry, Seedless Preserves, Scattered Straw
Distress Marker Antique Linen
Vellum
Tim Holtz Mini Paper Clips
Versamark inkpad
WOW embossing powder: Primary Burgundy Red, Bright Opaque White, Metallic Silver Super Fine
Thanks for stopping by today! Tomorrow we will have more Cup Of Tea projects by Belinda Spencer to share with you!
Cup Of Tea Stamp Set Project Ideas