- Products
- Blog
- Stockists
- About
- Contact
Hi there! Today we are sharing 5 great card ideas using the Cog Collection Eclectic Stamp!
Our first card was created by Teresa Abajo:
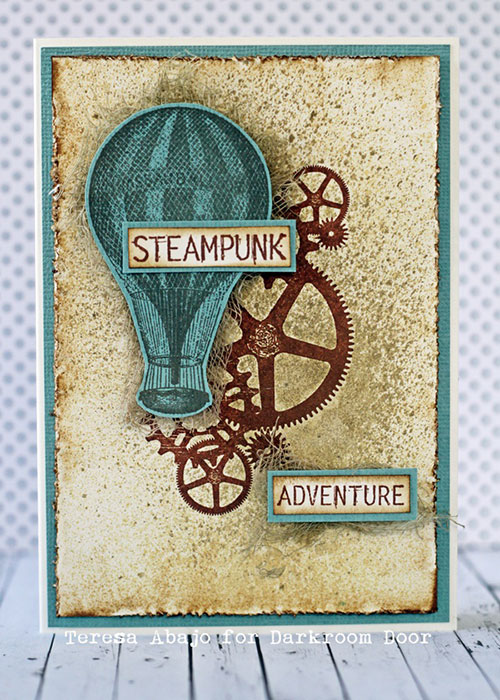
Instructions:
1. Stamp the Cogs Collection onto cream cardstock using Archival Coffee ink.
2. Spray with Distress Ink Spray in Frayed Burlap and Antique Linen. Distress the edges and sponge with Distress Ink Frayed Burlap.
3. Stamp the hot air balloon image from the Steampunk stamp set onto teal cardstock using Archival ink Watering Can. Cut out leaving a small border and adhere over Cogs Collection using foam mounting tape.
4. Stamp out the words from the Steampunk set, mount onto teal cardstock, and adhere to card front over scraps of Frayed Burlap stained cotton gauze.
5. Mount the card front onto teal cardstock, then onto a cream card.
Connie Mercer created this stunning card:
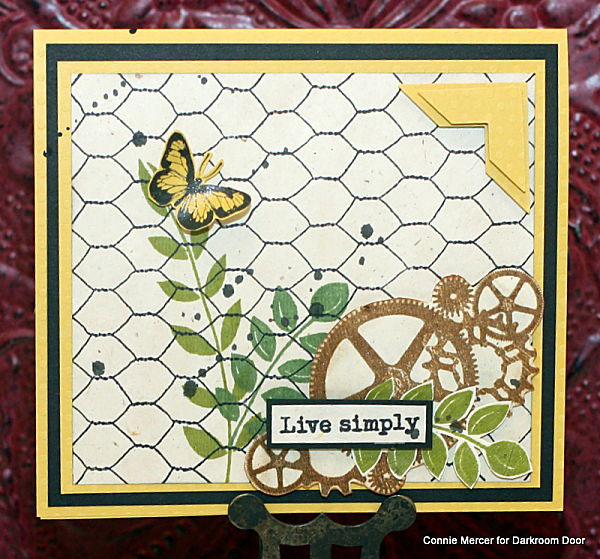
Instructions:
1. Stamp leaves from Carved Leaves Vol.1 stamp set on beige cardstock. Stamp two leaves on the front of the card, using two different shades of green ink. Stamp a third leaf and cut it out.
2. Using the Chicken Wire background stamp, stamp over the leaves on the card front, giving the effect the leaves are behind the Chicken Wire.
3. Stamp the Cog Collection in brown ink, using the same beige cardstock and cut it out. Shade with brown ink. Stamp the words "Live Simply" from the Enjoy The Ride stamp set on the beige cardstock and trim out. Mat the words on black cardstock. Adhere the Cog next to the leaves on the card front.
4. Adhere the third leaf on top of Cog and then the words. Mat card front on yellow cardstock and then black. Then adhere card front to yellow cardstock. This card is 5" X 5".
5. Stamp small butterfly from the Wings stamp set on the same yellow cardstock and cut it out. Adhere to front of card. Speckle with black ink or similar product. Apply Wink of Stella to leaves. Add corners.
Here are two cards by Robyn Wood:
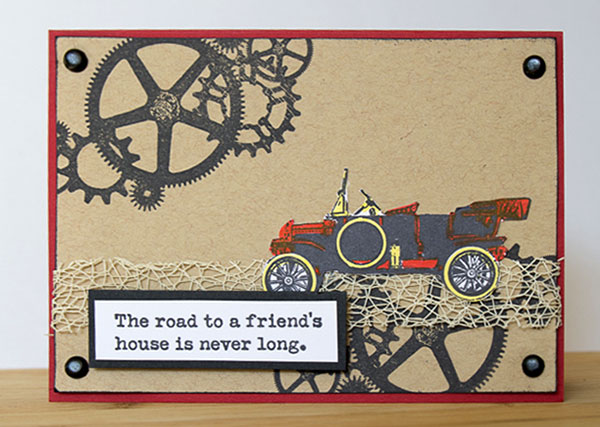
Instructions:
Trim a panel of craft coloured cardstock to suit a red card base and stamp two opposite corners with the Darkroom Door Cog Collection Eclectic stamp using black ink. Allow the stamp to go over the edges slightly. Sponge edges with Soot Distress ink & attach a black brad to each corner. Stamp a vintage car from the Darkroom Door Vintage Automobiles set onto white cardstock using black Archival ink. Colour the car with Distress Markers and trim closely. Stamp phrase from the same set onto white cardstock using black Archival ink, trim and mount onto black cardstock. Assemble card by adding a length of ribbon and affix to card front. Finish by adding car flat on the right hand side and the greeting on the left using some foam tape for a height.
The steampunk era was full of adventure and of course lots of cogs, gears and complicated machinery - so the Darkroom Door Steampunk stamp set is perfect to pair with this new Eclectic stamp. Robyn has used a crayon resist technique to give the cogs a bit of highlight.
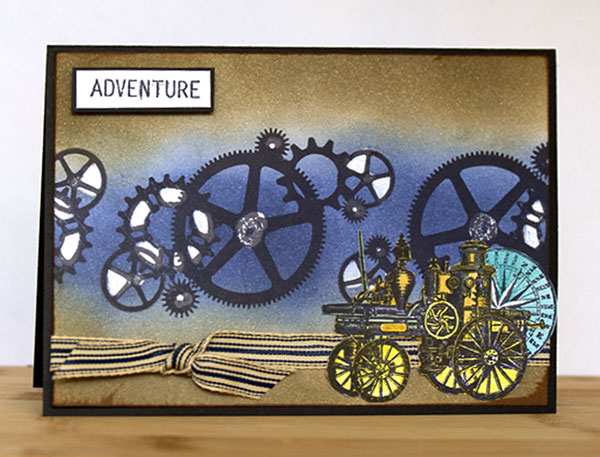
Instructions:
Stamp Darkroom Door Cog Collection Eclectic stamp three times across a panel of white cardstock cut to suit a black card front. Highlight some areas of the stamp using a white crayon and sponge across the centre with Chipped Sapphire Distress ink. Sponge either side of the purple with Frayed Burlap ink and then sponge the top and bottom with Vintage Photo ink. Sponge each side with Vintage Photo ink to give the edges some depth. Tie panel with ribbon and affix to card front. Stamp the word ‘Adventure’, the engine and compass from the Darkroom Door Steampunk set onto white cardstock using black Archival ink. Trim the word, layer with black cardstock and mount onto card front with foam tape. Colour the other pieces with Distress Markers, trim closely and add to card.
Our final card was created by Rachel Greig:
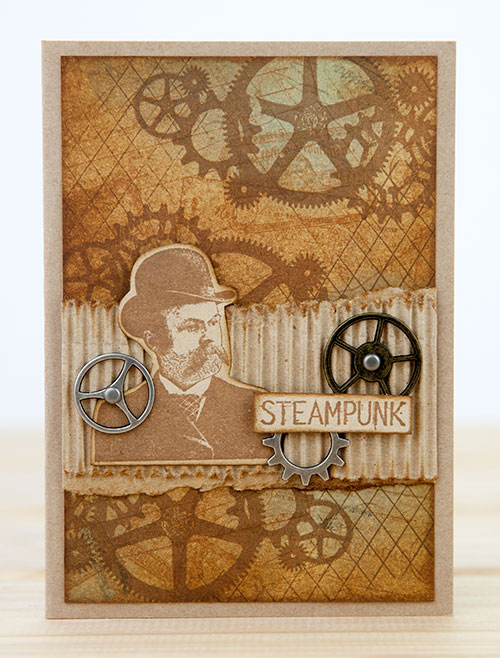
Instructions:
1. Sponge Vintage Photo and Iced Spruce Distress Inks over white cardstock to created a blended background.
2. Randomly stamp the postcard and memorabilia stamps from the Love Letters Vol 2 Rubber Stamp set over the background using Archival Coffee ink.
3. Stamp the Cog Collection Eclectic Stamp a few times over the background using Archival Coffee ink.
4. Trim stamped panel to fit on the front of a folded A6 card front. Sponge around the edges with Vintage Photo Distress ink and adhere to front of a kraft card.
5. Tear a piece of corrugated board and ink the sides with Vintage Photo Distress Ink. Stamp the man from Steampunk stamp set onto kraft cardstock with Archival Coffee ink. Trim and sponge around the edges. Adhere to corrugated card.
6. Attach metal cogs with brads or glossy accents. Stamp the word Steampunk from the Steampunk set and adhere to card with foam adhesive.
Supplies Used:
Darkroom Door Cog Collection Eclectic Stamp
Darkroom Door Wings Rubber Stamp Set
Darkroom Door Enjoy the Ride Rubber Stamp Set
Darkroom Door Carved Leaves Vol.1 Rubber Stamp Set
Darkroom Door Chicken Wire Background Stamp
Darkroom Door Vintage Automobiles Stamp Set
Darkroom Door Steampunk Stamp Set
Darkroom Door Love Letters Vol 2 Rubber Stamp Set
Ranger Archival Ink: Jet Black, Coffee, Watering Can
Distress Ink: Black Soot, Chipped Sapphire, Frayed Burlap, Vintage Photo
Distress Markers: Squeezed Lemonade, Festive Berries, Shattered Glass, Spiced Marmalade
Distress Spray: Frayed Burlap, Antique Linen
Black brads
Ranger Ink Blending Tool
White Crayon
Thanks for stoping by today!
Cog Collection Eclectic Stamp Project Ideas