- Products
- Blog
- Stockists
- About
- Contact
Hi from Texas! Connie Mercer here, to share with you some guy cards and a journal page using the new Classic Cars Vol.2 Stamp Set! This is great for creating cards for the men in your life. They all love cars and especially fast ones. This set also goes great with Classic Cars Vol.1. You will want both sets for sure. They compliment each other so well.
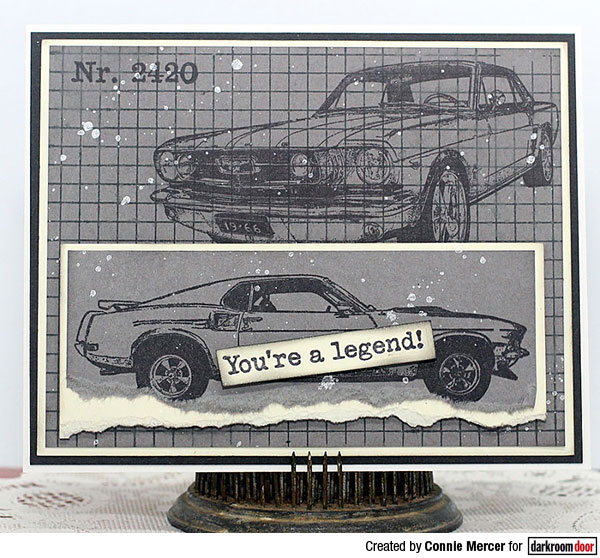
Instructions:
1. Start with a grey piece of cardstock for your card front.
2. Stamp the Grid Background Stamp on the grey cardstock with Distress Oxide Ink (Black Soot).
3. Using a spray bottle of water mist the front of the card. The ink will oxidize and create a distressed look. Dab off extra water. Dry with heat tool.
4. Stamp the car (front side view) stamp on card front.
5. Stamp numbers (from Vintage Office) in left top corner of card with Black ink.
6 Stamp the car (side view) on grey cardstock with black ink.
7. Trim out three sides and gently tear off bottom side.
8. Mat on beige cardstock. Repeat the tearing technique on the beige cardstock also.
9. Adhere to card front.
10. Mat the card front on beige cardstock and then black cardstock.
11. Then add to a folded white card base.
12. Speckle card front with white ink.
13. Stamp sentiment on beige card stock and trim out.
14. Shade with black ink and add to card front.
Supplies used:
Darkroom Door Classic Cars Vol.2 Stamp Set
Darkroom Door Vintage Office Stamp Set
Darkroom Door Grid Background Stamp
Cardsock: Letter It by Ranger
Distress Oxide Ink Pad: Black Soot
Archival Ink: Jet Black
Dylusions ink Spray: White Linen
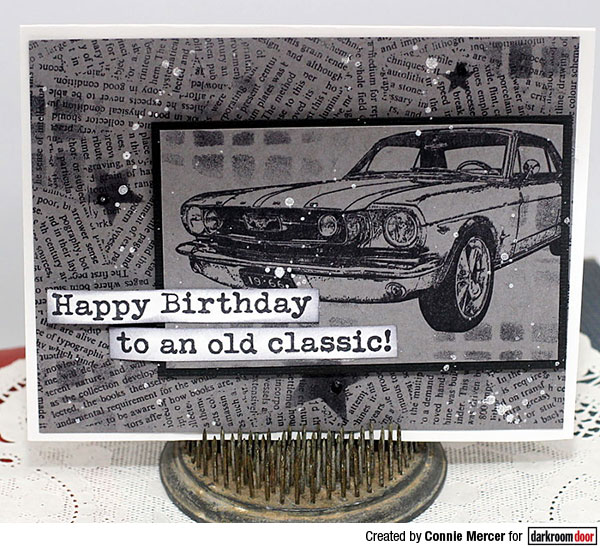
Instructions:
1. Using the Torn Text Background Stamp and grey cardstock, stamp the image on the cardstock with black ink.
2. Using the Large Mesh Stencil apply in random spots, on the card front, using black ink.
3. Do the same thing with the Large stars stencil, random spots on the card front with black ink.
4. Stamp the car on a smaller piece of grey cardstock and apply the Large Mesh stencil in random spots with black ink.
5. Matt the smaller piece on black cardstock.
6..Adhere to the card front.
7. Stamp sentiment with black ink on white cardstock and trim out.
8. Shade with black ink and adhere to card front with dimensional foam squares.
9. Speckle with white ink.
10. Add card front to a folded white card base.
11. Add three rhinestones to each star on the front of the card.
Products used:
Darkroom Door Classic Cars Vol.2 Stamp Set
Darkroom Door Torn Text Background Stamp
Darkroom Door Large Mesh stencil
Darkroom Door Large Starry Night Stencil
Cardstock: Letter It by Ranger
Archival Ink: Jet Black
Dylusions Ink Spray: White Linen
Other: black rhinestones
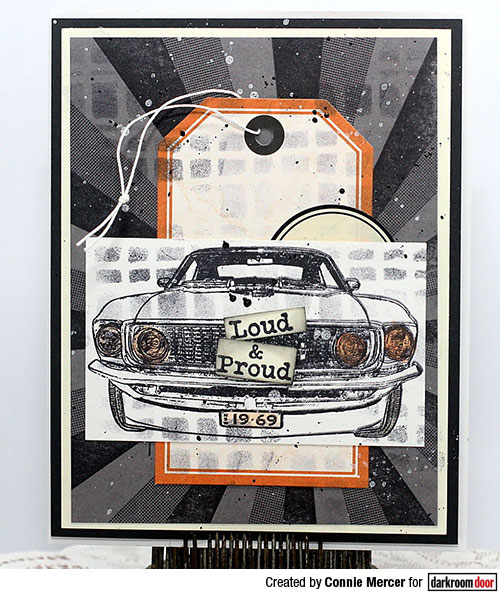
Instructions:
1. Using the Sunshine Background Stamp with grey cardstock, stamp the image using black ink.
2. Adhere a tag to the center of the card front.
3. Stamp the front facing car on white cardstock. Colour in the head lights to match colour of trim on the tag. I used watercolors to achieve this look.
4. Trim out to a rectangle shape.
5. Adhere to card front. Centre the rectangle over the tag.
6. Using the Large Mesh stencil apply random spots on card front.
7. Add circle sticker (had in my stash). Mat the card front to beige cardstock and then again on black cardstock.
8. Stamp sentiment on white cardstock with black ink.
9. Trim apart and shade each section with black ink.
10. Add to card front using dimensional foam squares.
11. Speckle with white ink.
12. Adhere to folded white card base.
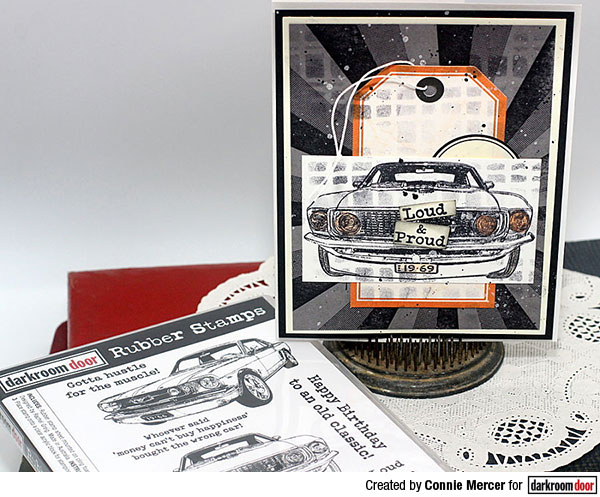
Products used:
Darkroom Door Classic Cars Vol.2 Stamp Set
Darkroom Door Sunshine Background Stamp
Darkroom Door Large Mesh Stencil
Archiva Ink: Jet Black
Dylusions Ink Spray: White Linen
Cardsock: Letter It by Ranger
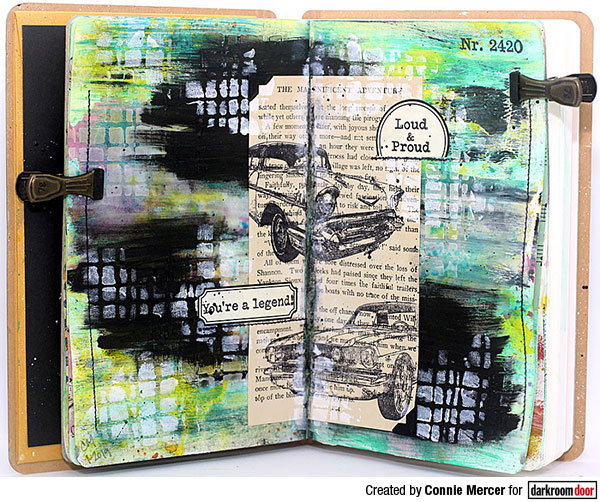
Instructions:
1. Create a background using layers and layers of random colors of acrylic paint. Mine started out as a page that I had cleaned the roller from the Gel-Press on. It has hints of pink and purple under the green and yellow tones. I dulled that with the black paint.
2. Add texture to the pages with stencils and modeling paste. The white modeling paste applied over paint kinda of takes on the colors of the paint and I lost the look I was going after.
3. So I re-applied the stencil using acrylic paint. The paint stayed white and I loved it on the black painted spots on the pages.
4. The sides of the pages were stamped with Stitched Borders set, giving the look that the pages were stitched with a sewing machine.
5. The center was created by stamping the car images on vintage dictionary paper with black ink. When the journal was closed the center paper tore apart.
6. Stickers were added and stamped with StazonOn black ink. (The stickers have a shiny surface and I wanted to make sure the text was not going to smear.)
7. Add speckles with black ink over the vintage dictionary paper.
8. Shading was added to the center, where the paper tore.
9. Vintage photo corners were added to the vintage dictionary paper.
Products used:
Darkroom Door Classic Cars Vol.2 Stamp Set
Darkroom Door Classic Cars Vol 1 Stamp Set
Darkroom Door Stitched Borders Stamp Set
Darkroom Door Vintage Office Stamp Set
Darkroom Door Large Mesh Stencil
Archival Ink: Jet Black
StazOn Ink: Black
Paint: DecoArt
stickers
Thanks for stopping by!
Connie
Classic Cars Vol 2 Cards