- Products
- Blog
- Stockists
- About
- Contact
Hi there! It’s Rachel Greig here today sharing some new Christmas card ideas using the Yuletide Greetings and Pine Cones Stamp Sets! These stamp sets can be used on their own or combined together to make some simple and classic card this Christmas.

Instructions:
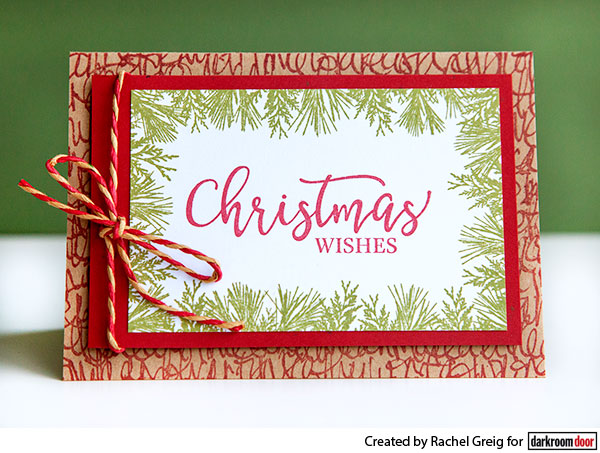
1. Stamp the Inky Script Background Stamp onto a folded Kraft card using Vermillion Archival Ink.
2. Stamp the Pine Leaves Frame Stamp onto white cardstock using Fern Green Archival Ink.
3. Stamp a large sentiment from the Yuletide Greetings stamp set in the centre of the Pine Leaves Frame using Vermillion Archival Ink. Trim the image to the edge of the leaves and adhere to 13cm x 8.5cm red cardstock, leaving a larger border on the left side to wrap twine or ribbon around and tie at the front.
4. Adhere entire panel to the front of the Kraft card.
This card would also look great if the Pine Leaves Frame or the sentiment was stamped and embossed with a tinsel embossing powder to add some bling!
This next card combines the Yuletide Greetings and the Pine Cones Stamp set together:

Instructions:
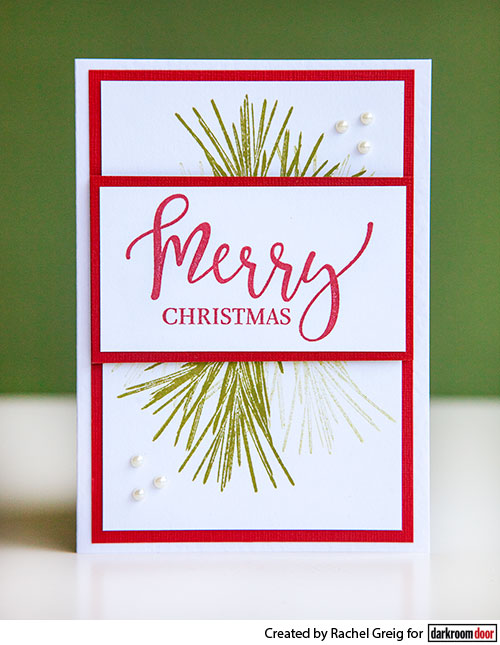
1. Stamp a pine leaf from the Pine Cones stamp set onto 13cm x 9cm white cardstock by placing the end of the stem at the top third of the cardstock. Stamp the leaf two times facing down and then rotate the stamp and stamp it facing upwards. Adhere this panel to 13.5cm x 9.5cm red cardstock.
2. Stamp a sentiment from Yuletide Greetings stamp set onto white cardstock and trim to 9cm x 5cm and adhere to 9.5cm x 5.5cm red cardstock. Adhere this panel over the stamped pine leaf panel to cover the area where the stems finish. Use foam adhesive to give it some dimension.
3. Adhere entire stamped piece to a folded white card. Add some pearl rhinestones to the top right and bottom left of the card.
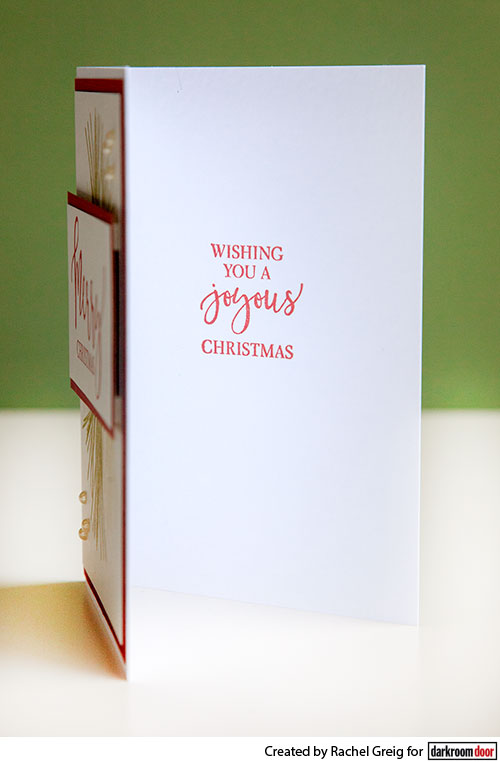
4. Stamp a smaller sentiment from the Yuletide Greetings stamp set inside the card using red ink.

This last card uses only the Pine Cones Stamp Set and has a softer look with the use of Distress Inks.

Instructions:
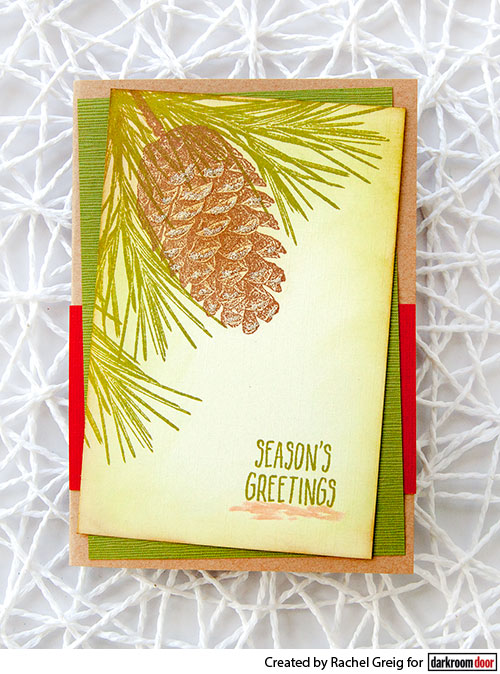
1. Stamp a pinecone from the Pine Cones stamp set in the top left corner using brown Archival Ink onto mixed media cardstock. Stamp the pine cone so it looks like it is hanging down.
2. Stamp a pine leaf from the same stamp set using Fern Green Archival Ink. Repeat as necessary to cover the edges of the card as you wish.
3. Stamp a sentiment from the Pine Cones stamp set in the bottom right corner using Fern Green Archival ink.
4. Using Distress Ink, lightly sponge around the edges of the cardstock to give the edges some shading. Use light colours of brown or green Distress Ink (Frayed Burlap, Brushed Corduroy, Peeled Paint etc)
5. Trim red cardstock to 10cm x 5.5cm and adhere across the bottom third section. Adhere a green piece of cardstock on an angle to a folded Kraft card.
6. Adhere stamped panel on an opposite angle to the green cardstock.
7. Add a small amount of Frosted Lace Stickles to some areas of the stamped pine cone to give it a little glimmer.
Supplies used:
Darkroom Door Yuletide Greetings Stamp Set
Darkroom Door Pine Cones Stamp Set
Darkroom Door Pine Leaves Frame Stamp
Darkroom Door Inky Script Background Stamp
Archival Inks: Vermillion, Fern Green, Coffee
Distress Inks: Brushed Corduroy
Stickles: Frosted Lace
Pearl Rhinestones
Twine
Ink Blending tool and foam
Mixed Media Cardstock
Cardstock: Kraft, white, red, green
I hope this gives you a few ideas for your Christmas cards this year! Thanks so much for stopping by!
Rachel
Christmas Card Ideas