- Products
- Blog
- Stockists
- About
- Contact
Hi there! There's one thing that stampers always need, and that is sentiment stamps! Today we are sharing projects created with the Brushed Sentiments Rubber Stamp Set! These are big bold sentiments that can make a real impact on your cards.
Belinda Spencer has created a series of bright coloured cards using the Brushed Sentiments with other Darkroom Door stamps, showing how you can mix and match to create some unique effects!

Instructions:
1. Apply Cracked Pistachio and Squeezed Lemonade Distress Inks to the Shadow 12 Up Frame Stamp. Spritz the stamp with water and apply to a piece of watercolour paper. Use a soft, wet paintbrush to blend the colours. Don?t use too much water though as you may lose the shape of the squares. Crop around the image keeping a small border. Distress the edges and ink with Spiced Marmalade Distress Ink.
2. Cut a piece of smooth white cardstock slightly larger than the watercolour piece. Apply Spiced Marmalade ink to the Triangles Background Stamp. Spritz with water and apply to the cardstock. Use the paintbrush again to blend the ink a little. Dry with a heat gun. Distress the edges and ink with the Spiced Marmalade ink. Layer the two pieces together.
3. Add some embroidery thread and sequins to the background. Add the card front to a yellow cardstock base.
4. Apply Distress Inks in Squeezed Lemonade, Spiced Marmalade, Twisted Citron and Cracked Pistachio to a flower from the Carved Flowers Rubber Stamp Set. Spritz with water and stamp on a piece of watercolour paper. Soften the lines of the carved flower by blending the inks slightly with the paintbrush. Add 3D foam to the back and stick down on the card front.
5. Stamp the Thankyou Brushed Sentiment on white cardstock using the Spiced Marmalade ink. Fussy Cut the sentiment and add to the card using 3D foam.
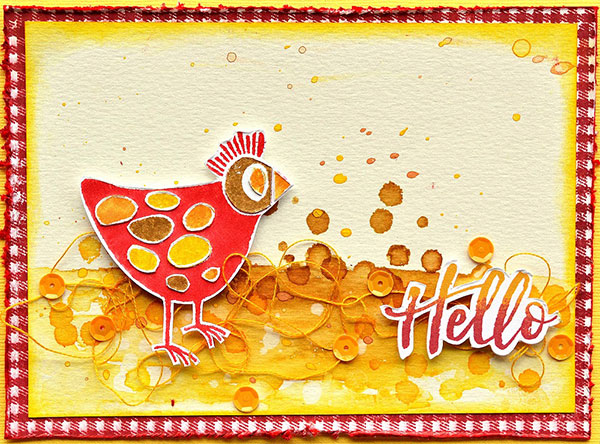
Instructions:
1. Cut a piece of watercolour paper to size. Apply Distress Inks in Brushed Corduroy, Mustard Seed and Wild Honey to one of the Watery Washes stamps. Spritz the stamp with a little water and apply onto the watercolour paper. Use a soft, wet paintbrush to blend the inks a little and spread the colour further.
2. Apply the same inks to the splats stamp from the same set. Spritz with water and apply to the watercolour piece. Repeat as many times as you would like. Use a soft, wet paintbrush again to blend the ink a little for a smoother finish.
3. Stamp the cute chicken from the Carved Birds Vol 1 Stamp Set onto smooth white cardstock using Red Geranium Ranger Archival Ink. Stamp the chicken three more times using the Distress Inks from Step 1. Fussy cut various pieces from the different colours and piece together on top of the red chicken base. Fussy cut the whole chicken and add 3D foam to the back.
4. Add some embroidery thread across the ?ground? before layering the chicken on top. Glue on a few sequins in a co-ordinating colour.
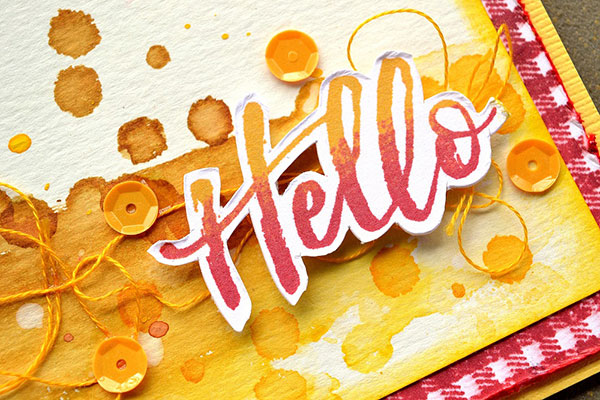
5. Create a two-toned sentiment by applying two colours of Ranger Archival Ink to the ?Hello? Brushed Sentiment. Pale Ochre and Red Geranium have been used in the example. Fussy cut the word and add to the card using 3D foam. Ink the edges of the card front with the Mustard Seed ink.
6. Cut a piece of smooth white cardstock slightly larger than the watercolour piece. Apply the Plaid Background Stamp to this piece using Red Geranium ink. Distress the edges and ink with Candied Apple Distress Ink. Layer the two pieces together and add to a yellow cardstock base.
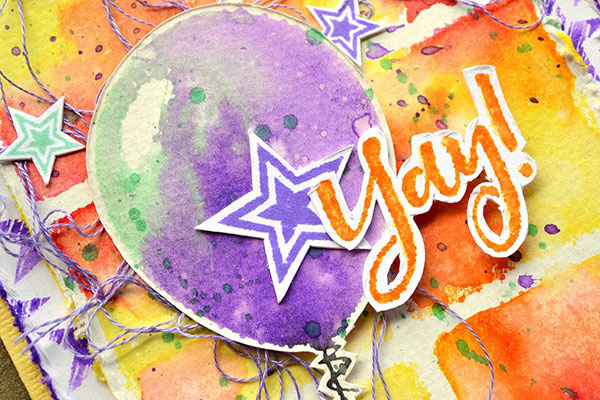
If you're wondering how to use the 'Yay' sentiment, here's a fun idea from Belinda. She has used it for a birthday card. You could also use it to celebrate a special event, or for any happy news such as pregnancy, engagement, graduation, new job and more! It's a fun stamp!
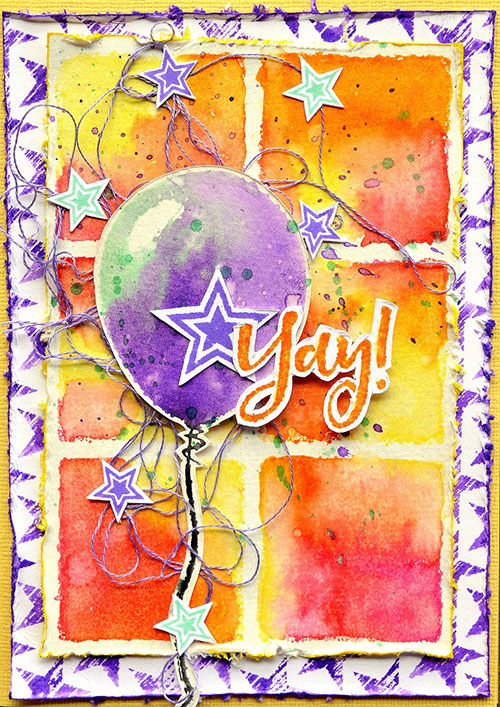
Instructions:
1. Apply Picked Raspberry, Spiced Marmalade and Squeezed Lemonade Distress Inks to the Shadow 6 Up Frame Stamp. Spritz with water and apply to watercolour paper. Blend the inks using a soft, wet paintbrush. Try not to use too much water so as to maintain the square shapes of the frame stamp. Dry with a heat gun. ?Smoosh? some Cracked Pistachio and Wilted Violet Distress Inks onto an acrylic block. Add some water with a paintbrush a flick the colours over the stamped piece. Cut around the frame stamp image adding a small border. Distress the edges and ink with Squeezed Lemonade.
2. Crop a piece of smooth with cardstock slightly larger than your frame stamp piece. Apply Wilted Violet ink to the Brushed Stars Background Stamp and stamp on this piece. Distress the edges and ink with the Wilted Violet ink. Layer the two pieces together.
3. Add some purple embroidery thread to the background and adhere using tiny blobs of glue.
4. Apply Cracked Pistachio and Wilted Violet inks to the balloon from the Party Time Rubber Stamp Set. Spritz with water and stamp on watercolour paper. Blend with the paintbrush. Dry with a heat gun. Flick some Cracked Pistachio over the top. Fussy cut the balloon and add to the card front with 3D foam.
5. Stamp some stars from the Stars Rubber Stamp Set on smooth white cardstock using the Cracked Pistachio and Wilted Violet inks. Add some double sided tape to the back of the cardstock before fussy cutting the stars. This means you now have ready made little star stickers! Add the stars to the card front.
6. Stamp the ?Yay!? sentiment on cardstock using the Spiced Marmalade ink. Fussy cut and add to the card front using 3D foam. Add the card front to a yellow cardstock card base.
Now to share some cards by Teresa Abajo who has created two different sympathy cards:
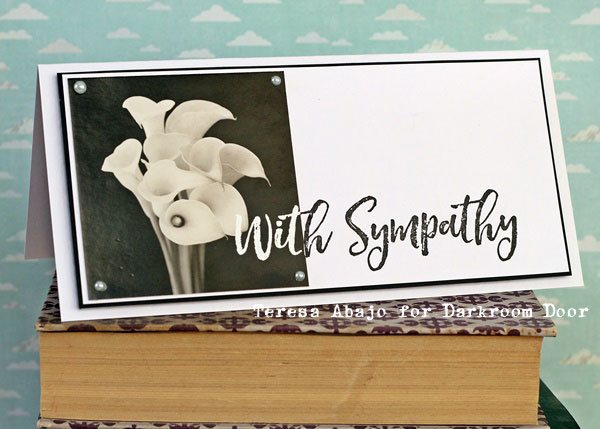
Instructions:
1. Stamp the first few letters of the With Sympathy sentiment onto a Viva La Flora Photochip image using Versamark ink. Emboss with white embossing powder.
2. Stamp the sentiment onto white card using Archival ink Jet Black, then adhere the Photochip over the top, lining up the letters.
3. Mount onto black cardstock then onto a white card base.
4. Adhere some pearls to the corners for the Photochip.
Here is another version where Teresa has used vellum to give it a softer look.
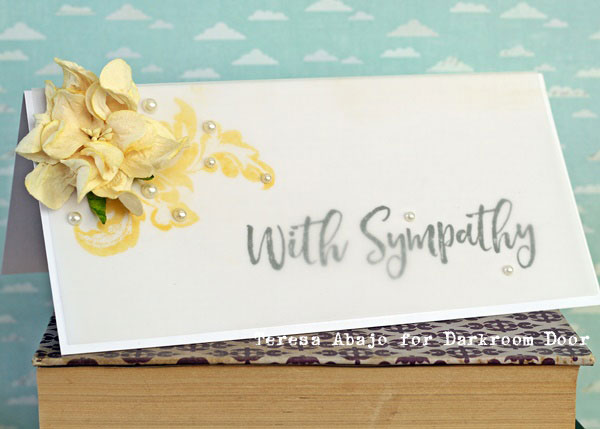
Instructions:
1. Stramp the With Sympathy sentiment onto the front of a white card using Archival ink Jet Black.
2. Fold a piece of vellum to fit over the card, then stamp the Fancy Flourish Eclectic stamp in the top left hand corner using Archival ink Chrome Yellow.
3. Apply vellum adhesive tape to the back of the white card and adhere the vellum in place.
4. Attach a large flower and some pearls over the flourish.
Thank you for joining us today, here's a final card from Teresa showing how the sentiments look when layered and gold embossed. It's a beautiful effect!
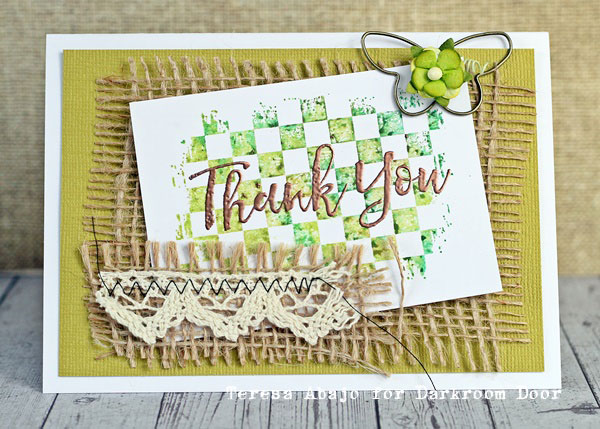
Instructions:
1. Apply Distress Inks (Twisted Citron and Pine Needles) to the Checkered Texture Stamp, and stamp onto white cardstock. Trim down to size.
2. Stamp the Thank You sentiment with Versamark ink, then emboss with Copper embossing powder.
3. Add a butterfly paperclip and flower to the top right hand corner of this piece.
4. Adhere this piece to some hessian, then onto a piece of green card. Adhere to a white card base.
5. Use a sewing machine to attach a scrap of cotton lace and a scrap of hessian to the bottom left and side of the card.
Supplies Used:
Darkroom Door Brushed Sentiments Rubber Stamp Set
Darkroom Door Carved Flowers Rubber Stamp Set
Darkroom Door Watery Washes Rubber Stamp Set
Darkroom Door Carved Birds Vol. 1 Rubber Stamp Set
Darkroom Door Stars Rubber Stamp Set
Darkroom Door Party Time Rubber Stamp Set
Darkroom Door Brushed Stars Background Stamp
Darkroom Door Shadow 6 Up Frame Stamp
Darkroom Door Plaid Background Stamp
Darkroom Door Triangles Background Stamp
Darkroom Door Shadow 12 Up Frame Stamp
Darkroom Door Fancy Flourish Eclectic Stamp
Darkroom Door Checkered Texture Stamp
Photochips: Viva La Flora Collection
Archival Ink: Pale Ochre, Red Geranium
Distress Ink: Cracked Pistachio, Spiced Marmalade, Squeezed Lemonade, Twisted Citron, Brushed Corduroy, Candied Apple, Mustard Seed, Wild Honey, Black Soot, Picked Raspberry, Wilted Violet
Until next time, happy stamping!