- Products
- Blog
- Stockists
- About
- Contact
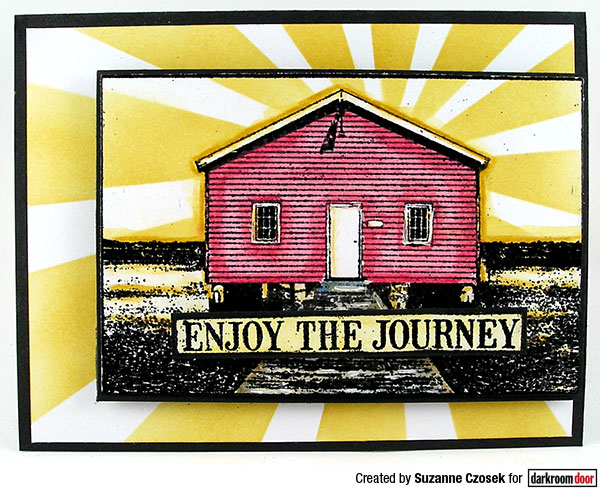
Hi! Suzz Czosek here to share a variety of fun projects using the new Boat Shed Photo Stamp! The new stamp had me thinking of warm sunny days out on the water.
My first card uses the new Sunshine stencil and allowed me to create a focal point using the rays of sunshine behind the boat shed.
Instructions:
1. Stamp Boat Shed using black archival ink. Heat emboss using black embossing powder.
2. Mask image with the stamped mask. Place sunshine rays stencil over masked image.
3. Sponge yellow die ink over stencil from the shore line up.
4. Colour the image using watercolour pencils and waterbrush.
5. Sponge sunshine rays on another piece of white cardstock.
6. Cut out image and mount on black cardstock.
7. Line up sunshine rays on main image with background image and cut background rays to fit on card base.
8. Stamp sentiment with black ink. Heat emboss using black embossing powder.
9. Cut out sentiment and mount on black cardstock. Using foam tape attach sentiment to main image.
10. Using foam tape attach main image to background sunshine.
11. Attach mounted image and background to cardbase.
Supplies used:
Darkroom Door Photo Stamp: Boat Shed
Darkroom Door Word Block Stamp: Journey
Darkroom Door Large Stencil: Sunshine
Ranger Distress Ink: Fossilized Amber
Ranger Archival Ink: Jet Black
Black Embossing Powder
Watercolour Pencils
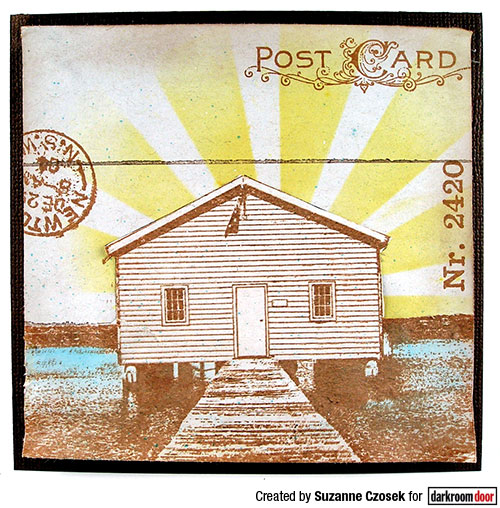
Here's another card using the Sunshine stencil behind the Boat Shed:
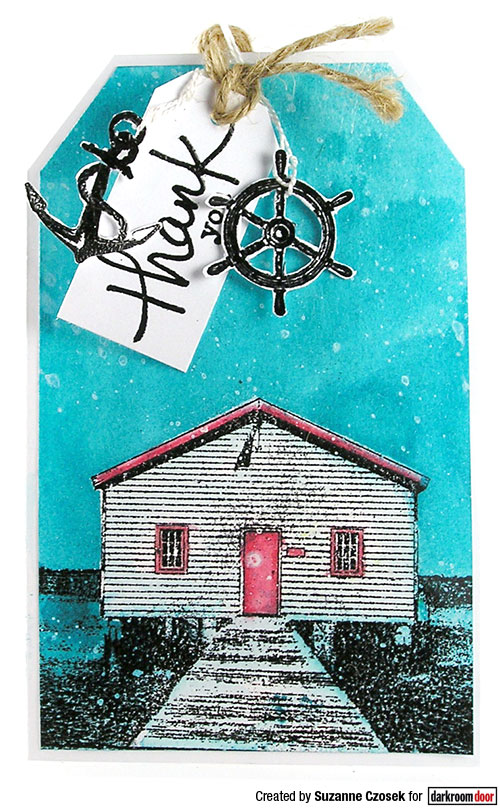
For my next project I created a tag card:
Instructions:
1. Stamp the boat shed onto white cardstock using black archival ink. Heat emboss with black embossing powder.
2. Stamp the boat shed image onto copy paper with black archival ink. Cut out the boat shed and the dock to use as a mask. (we will use this in a few of the projects, so keep it nearby)
3. Mix up white acrylic paint with spritz of water to make a runny white mix. Flick that over the stamped image. Repeat until you get a nice spatter of white.
4. Let paint dry. Place mask over stamped boat shed and dock. You can use re-positionable tape to keep it flat and protecting the stamped image.
5. Spray Peacock Feathers Distress Stain Spray over the background. Let dry.
6. Pull up the mask from the image and add red trim and doors using watercolor pencils and waterbrush.
7. Cut tag from background to desired size. Mine measured 3 1/2" x 5 1/2".
8. Create card base 1/4" larger from the tag.
9. Stamp anchor and steering wheel in archival ink. Heat emboss with black embossing powder. Cut out using detail scissors.
10. Stamp sentiment using black archival ink. Heat emboss with black embossing powder.
11. Cut sentiment into tag shape.
12. Attach tag and elements to top of card with twine.
Supplies used:
Darkroom Door Photo Stamp: Boat Shed
Darkroom Door Rubber Stamp Sets: Sail Away, Simple Sayings Vol. 1
Ranger Distress Stain Spray: Peacock Feathers
White Paint
Ranger Archival Ink: Jet Black
Black Embossing Powder
Watercolour Pencil
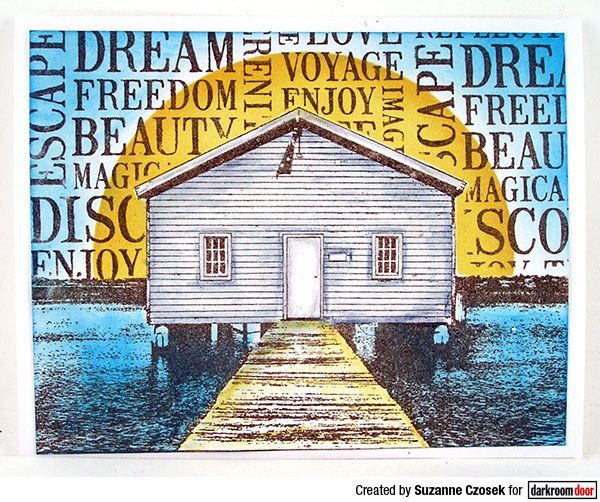
For this next cad I wanted to create a sunset feel with the boat shed.
Instructions:
1. Stamp Boat Shed using brown archival ink on white cardstock.
2. Place Boat Shed Mask over stamped image.
3. Cut 3 1/2" circle from cardstock. Use the opening left form the die cut to place over the masked boat shed. Mask along the shore line with another piece of paper.
4. Sponge yellow die ink in the circle to create the sun set behind the boat shed.
5. Sponge around the edges of the circle with a light orange die ink to add more shading.
6. Remove circle mask.
7. Leave mask over boat shed water and shoreline.
8. Stamp words over background using brown archival ink. Cut out main image to frame on card.
9. Place the circle die cut over the sponged sunset. Sponge blue die ink around the edges and on the bottom.
10. Add color and shading on the boat house and the dock using watercolor pencils and waterbrush.
11. Mount image on cardbase.
Supplies used:
Darkroom Door Photo Stamp: Boat Shed
Darkroom Door Word Block Stamp: Journey
Ranger Distress Ink: Broken China, Fossilized Amber, Wild Honey
Watercolour Pencils
Circle Die Cut
Ranger Archival Ink: Coffee
For my last project I wanted to play with a journal page and layering the images to get some ideas for scrapbooking a vacation layout.
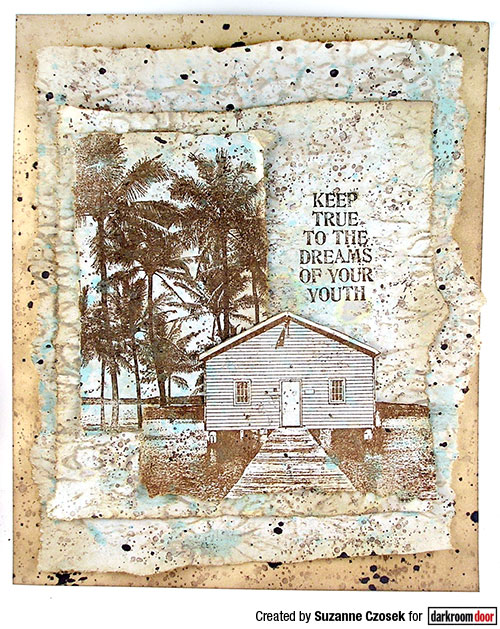
Instructions:
1. Stamp the boat shed using brown archival ink on newsprint paper. Cut the top and sides of the image and tear along the bottom.
2. Stamp the palm trees using brown archival ink on newsprint paper. Tear edges around image.
3. Stamp sentiment using brown archival ink on another sheet of newsprint paper. Tear a larger panel to hold both other torn images.
4. Tear a larger sheet of newsprint to cover all the different pieces.
5. Smear blue distress oxide ink on craft mat. Spritz with water. Using an acrylic block smear the water and ink to get dots of blue ink on the mat. Place newsprint paper of all images in the ink to pick up spots of blue in the paper. Repeat the process until you get the desired effect on all sheets of newsprint with stamped images and backgrounds.
6. Repeat the process from the previous step with a light brown ink.
7. Stamp over the backgrounds using the splatter stamp and dark brown die ink. Randomly stamp to add splatters.
8. Drip and splatter dark brown distress stain spray randomly over background.
9. Assemble layers and place on tan background cardstock as base.
Supplies used:
Darkroom Door Photo Stamp: Boat Shed, Palm Trees
Darkroom Door Texture Stamp: Splatter
Darkroom Door Rubber Stamp Sets: Enjoy Life
Ranger Distress Oxide Inks: Frayed Burlap, Broken China
Ranger Archival Ink: Sepia
Ranger Distress Stain Sprays: Ground Espresso
I hope this has you feeling the warm and sunny weather and inspired to ink up the new Boat Shed Stamp!
Suzz
Boat Shed Photo Stamp Projects